AREA SETUP
Picture frame
(Open picture frame - 6 or 9children) Print and add a picture of each child in your group. Laminate and display. You may also make several copies and give one to each child as a special Easter gift.
Identification cards-Easter
(Open identification cards - Easter) Print and write the names of the children in your group. Use the identification cards on cubbyholes, personal belongings, etc.
Easter poster
(Open poster - room identification Easter) Print. This series of Easter posters can be used to identify the various rooms within the daycare.
Circle time
For Easter, transform your circle time area so it looks like an Easter egg. Deposit Easter illustrations on the floor in an oval shape. For a personal touch, you may also add a picture or a drawing of each child next to their spot. This will help children identify their spot quickly and easily.
Easter tree
Transform your Christmas tree to make it look like an Easter tree. Make decorations with your group. You may add pastel-coloured lights. Children will love lighting the Easter tree during naptime.
Easter tablecloth
Purchase a paper tablecloth. Cut Easter-related items out of magazines and flyers and glue them on the tablecloth. Children will be proud of their Easter tablecloth. Children may also draw on the tablecloth or glue pastel-coloured paper or confetti on it.
Decorated door
Add Easter shapes or colourful Easter eggs around your door. You may hang some shapes using ribbon to make an original Easter curtain. Children will look forward to their arrival each day.
A special window
If you are lucky enough to have a large window or glass door in your daycare, let children paint Easter designs on it using poster paint. It is a little messy but it is really easy to wash off when they are done. Variation: A large paper banner can easily replace a window.
Arts & crafts corner
Cover the walls entirely with large pieces of white paper. Let children decorate the paper as they wish using Easter materials. This activity is perfect for the beginning and the end of the day, when children are not all present.
Reading corner
Set up a special reading corner. Use an empty appliance box to create a hideout. Add a curtain made out of pastel-coloured ribbon. Inside, hang small purple, green, and yellow lights. Add any stuffed animals or puppets you may have which represent farm animals. Cover a small box with pastel-coloured tissue paper and add hay inside. It can be used to store books.
Easter workshops
(Open Easter workshops) Print and display to identify your various workshops throughout the Easter period.
CEILING DECORATIONS
Easter ceiling
Hang pieces of tulle or fabric squares from the ceiling. Add colourful Easter eggs and stuffed animals which represent farm animals.
Easter garland
Cut strips of pastel-coloured construction paper. Use the strips to make rings and make a chain with them, alternating colors. Hang the garland from the ceiling.
Piñata
Make your own egg-shaped piñata with your group. Fill it with candy, small chocolates, and Easter surprises. Hang from the ceiling and empty it during your Easter party.
FLOOR DECORATIONS
Easter floor
Cut a large piece of contact paper (Mac-Tac). Remove the backing and deposit it so the sticky side is facing up. Visually divide the paper into two equal parts. On one side, add a few tablespoonfuls of light pink, purple, blue, and white poster paint. The quantity depends on the size of your paper. Next, fold the paper over. Be sure to seal the paint pocket securely on all sides. Children may walk on it to mix the paint colors. You may make several paint pockets and deposit them throughout the daycare. Check the pockets regularly to make sure the edges remain sealed.
Easter path
Print several Easter illustrations or collect pictures from old magazines or calendars you may have. Deposit them on the floor throughout the daycare to create a path which leads to various locations children visit frequently such as the play area, the bathroom, the cloakroom, etc.
Bunny tracks
(Open bunny tracks) Print, cut out, and laminate. Deposit the bunny tracks on the floor throughout the daycare. Use them to define certain areas, to create paths which lead to different areas within the daycare or between two daycare rooms, etc.
ENTRANCE AND CLOAKROOM DECORATIONS
Easter cubbyholes
(Open picture frame - Easter) Print for each child. Use the frames to decorate each child's cubbyhole. You can also take pictures of the children and turn them into Easter characters. For example, print a bunny, cut out the face, then add a child's picture. Let children decorate their character.
Decoration for the daycare entrance
Purchase two pastel-coloured plastic tablecloths. Cut the tablecloths so they are the same size as your door. Cut vertical slits, 10 cm apart, leaving 20 to 30 cm uncut at the top (the part which will be hung in the doorway). Hang one tablecloth inside the daycare and the other one on the outside of the daycare. Children will love crossing the colourful entrance.
BATHROOM DECORATIONS
Display
Hang various decorations children make on the bathroom walls.
Easter bathroom
Add tiny Easter stickers on furniture and accessories throughout the bathroom (stepping stool, toothbrush holder, changing table, shelves, etc.)
OUTDOOR DECORATIONS
Easter tree
Decorate your trees by hanging Easter eggs from the branches.
Mr. Rabbit
Make a giant rabbit. Stuff him and place him near the daycare entrance.
Surprise bottles
Fill plastic soft drink bottles with water and tiny Easter objects (erasers, food coloring, confetti, etc.) You may also fill them with sand and wrap them with Easter illustrations or drawings. Line the walkway which leads to your daycare with the bottles.
BUNNY DECORATIONS
 Bunny garland
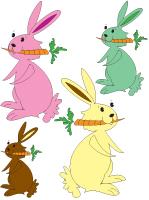
(Open models - bunnies) Print and let children decorate the bunnies with sparkles, pieces of paper, markers, etc. Cut them out and assemble as a garland. Hang within the daycare or at the daycare entrance.
Bunny mobile
(Open models - bunnies) Print, cut out, and decorate the bunnies with sparkles, lace, ribbon, cotton balls, confetti, etc. Glue the bunnies back to back on either side of a piece of ribbon or string. Hang the mobile from the ceiling.
My miniature bunny
(Open models - bunnies) Print, cut out, and color. Glue the bunny pieces on an empty toilet paper roll. Hang from the ceiling.
Bunny face
(Open craft - bunny face) Print for each child. Have each child paint a paper plate. Have them cut out the eyes, nose, mouth, and ears. Help them glue them on the paper plate. Decorate the ears with cotton balls. Sprinkle sparkles on the cotton balls and staple the ears to the top of the plate.
Big bunny
(Open craft - Big bunny) Print for each child. Assemble the bunny pieces with fasteners where indicated.
Bunny
Use two paper plates, a small one for the head and a larger one for the body. Draw eyes, a nose, a mouth, and moustaches on the small plate. Glue two bunny ears to the top of the plate. Secure the head on the body. Cut out four little paws. Glue two paws under the head and two paws at the bottom of the body. Glue cotton balls behind the craft for a bunny tail.
Mr. and Mrs. Bunny
Place a Styrofoam glass upside down. Draw a bunny face on the front of the glass. Use pipe cleaners to make moustaches. Add ears to the top of the glass.
EGG DECORATIONS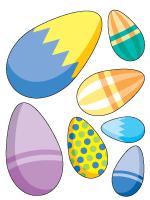
Egg garland
(Open egg shapes) Print, cut out, and glue on a string. Use pastel-coloured string and construction paper.
Egg mobile
(Open models - eggs) Print, cut out, and decorate the eggs with sparkles, lace, ribbon, cotton balls, confetti, etc. Glue the eggs back to back on either side of a piece of string or ribbon. Hang from the ceiling.
Mr. Egg
(Open craft - Mr. Egg) Print. Have children color and cut out the pieces. Use the egg for the head and body. Fold strips of purple or light green paper accordion-style for the arms and legs. Glue the medium-sized eggs to the ends to represent the hands and feet.
Egg suncatcher
Cut an egg shape out of contact paper (Mac-Tac). Let children fill it with fun Easter objects such as metallic confetti, sparkles, orange feathers, pieces of tissue paper, etc.) Cover with a second piece of contact paper and display in a window.
Hanging eggs
Wrap Styrofoam eggs with tissue paper. Let children decorate them as they wish. Use a paperclip to make a hook (straighten one end). Hang to display.
Easter basket
You will need milk cartons, construction paper, tissue paper, glue, a stapler, and scissors. Remove the top part of the milk carton. Cut a strip of construction paper and staple it on opposite sides of the carton. Let children decorate their basket. Add Easter hay to the bottom of the basket along with chocolate or plastic eggs. Hang baskets throughout the daycare or deposit them on tables to decorate.
Shiny egg
Decorate a Styrofoam egg. Coat it with glue and roll it in sparkles and sequins.
Giant egg
Cut an egg shape out of white cardboard or a white paper plate. Pour glue into a few small bowls. Add a few drops of food coloring to each bowl. Use the mixture to paint the egg shape. For added shine, sprinkle with salt or sugar.
CHICK DECORATIONS
Chick garland
(Open models - chicks) Print and let children decorate the chicks with sparkles, markers, pieces of paper, etc. Cut the chicks out and assemble as a garland. Hang within the daycare or in your entrance.
Chick mobile
(Open models - chicks) Print, cut out, and decorate the chicks with sparkles, lace, ribbon, cotton balls, confetti, etc. Glue the chicks back to back on either side of a piece of ribbon or string. Hang from the ceiling.
My hanging chick
Use two paper plates. Glue the edges together. Paint them yellow. Glue feathers or cotton balls on the surface. Add wiggly eyes and a small orange triangle for the beak. Make a hole at the top. Thread a piece of string through it and hang to display.
Fly away little chick
(Open craft - chick) Print for each child. Cut out the pieces for the chick's face and set them aside. Trace circles on a yellow piece of construction paper and cut them out. Cut one of the small circles in half and use the half circles for wings. The other small circle will be the chick's head. The largest circle will be for the body. Have children complete the chick's face with the pieces. Glue the face on the larger circle (just enough for it to stay put). Next, glue the legs to the body. Attach the wings to either side of the body using fasteners. The wings will move up and down. It will look like the chick is flying.
Hatching chick
Use two paper plates. Cut one plate in half, with zigzag marks to make it look like a cracked egg. Paint the other plate yellow or orange. Paint the half plate white, like an egg shell. Glue the half plate to the full plate leaving room to add something between the two. Have children paint black eyes or glue wiggly eyes. Cut out an orange beak and glue it on the face. You may glue feathers on the chick too. Make a hole at the top and hang to display. You can slide a small Easter surprise inside.
DUCK DECORATIONS
Duck garland
(Open models-ducks) Print and let children decorate the ducks with sparkles, markers, pieces of paper, etc. Cut the ducks out and assemble as a garland. Hang within the daycare or at the daycare entrance.
Duck mobile
(Open models - ducks) Print, cut out, and decorate the ducks with sparkles, lace, ribbon, cotton balls, confetti, etc. Glue them back to back on either side of a piece of ribbon or string. Hang from the ceiling.
Mr. Duck
(Open craft - Mr. Duck) Tear, crumple, and glue yellow, orange, or white tissue paper on the duck shapes. Add feathers. Assemble Mr. Duck using fasteners or string.
Have fun!
The Educatall team
 Home
Home Theme activities
 Babies and toddlers
 Arts and crafts
 Science
 Creative recipes
 Tips and tricks
 Special needs
 Extra activities
 Educ-TV
 Newsletter
  Online store
 Educatall club

