This week, the educatall team has created a series of creative workshops that you can enjoy with your group as you prepare for Halloween. For the most part, these workshops can be enjoyed both indoors or outside. You will find that this theme is packed with ideas to keep your group busy for days!
AREA SETUP
(Open thematic poster-Halloween-Creative workshops) Print, laminate, and display within your daycare where parents will see it.
Creating a special Halloween-Creative workshop wall
Pick a wall that can be used to display children’s artwork. You could, for example, write Halloween-Creative Workshops at the top. Make sure you use a wall that everyone will see, parents and children. You could also hang a simple indoor clothesline in front of your wall and use it to display drawings or other projects. Take pictures of the children in your group when they are busy being creative. Print them and display them on your wall, among their masterpieces.
Stickers
(Open stickers-Halloween-Creative workshops) Print the illustrations on adhesive paper and use them to create unique stickers.
Educa-decorate-Halloween-Creative workshops
(Open educa-decorate-Halloween-Creative workshops) Print, cut out, and laminate. Use the items to decorate the walls of your daycare and set the mood for the theme.
Educa-theme-Halloween-Creative workshops
(Open educa-theme-Halloween-Creative workshops) Print and laminate the items that represent the theme. Use them to present the theme to your group (and parents) while decorating your daycare.
PICTURE GAME
The pictures may be used as a memory game or to spark a conversation with your group. Use them to decorate the daycare or a specific thematic corner. (Open picture game-Halloween-Creative workshops) Print, laminate, and store in a “Ziploc” bag or in your thematic bins.
LANGUAGE ACTIVITIES
Word flashcards-Halloween-Creative workshops
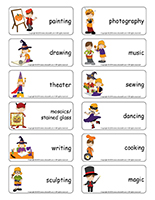
(Open word flashcards-Halloween-Creative workshops) (Open giant word flashcards-Halloween-Creative workshops) Print. The word flashcards may be used to spark a conversation with your group, in your reading and writing corners, or to identify your thematic bins. Painting, drawing, theater, mosaics/stained glass, writing, sculpting, photography, music, sewing, dancing, cooking, magic
HALLOWEEN-CREATIVE WORKSHOPS-PAINTING
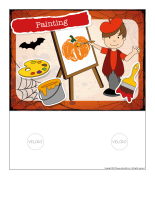
(Open poster-Halloween-Creative workshops-Painting) Print, laminate, and display to identify your workshop.
Inventory-Halloween-Creative workshops
(Open inventory-Halloween-Creative workshops-Painting) Print and insert this sheet in your thematic bin. Use it to inventory the contents of your bin. Add a variety of items such as: paintbrushes (different sizes), rollers, bowls, wooden sticks, platters, aprons, ribbons, hats, color swatches and samples, etc. Dress children up to make them look like artists. They can wear old shirts with paint stains on them. Hang large pieces of paper on the walls of your daycare and set an old bedsheet on the floor. Let children paint on the paper using different tools and colors. Encourage them to use bowls to mix colors or, if you prefer, provide real paint palettes or large Styrofoam meat platters. Simply cut a thumbhole out of each one so children can hold them like real artists.
Planning chart-Halloween-Creative workshops
(Open planning chart-Halloween-Creative workshops) Print, laminate, and use with a dry-erase marker so you can use this chart year after year. This indispensable tool will help you prepare and create the material needed for the workshops you wish to offer. It will also simplify the organization of your environment and help you plan per children’s interests. What’s more, you can use the chart to assess and analyze the activities you present on a daily or weekly basis.
Follow-up booklet-Halloween-Creative workshops
(Open follow-up booklet-Halloween-Creative workshops) Print for each child. This follow-up booklet will help you gain a better understanding of what children are learning in each workshop.
Creative workshop suggestions-Painting
- Encourage children to explore paint with their fingers.
- Plan a workshop where children can mix two colors together (orange and black) to see what happens. You can also provide them with the opportunity to mix two primary colors and explain how once they are well blended together, they will have created a secondary color (ex. blue+yellow=green). Variation: Have fun applying a small amount of red paint to the tip of one of your fingers (or your entire palm) and applying a small amount of yellow paint to the tip of a child’s finger (or entire palm). Press your fingers or palms together to see orange appear.
- Have children paint on colorful paper. Try to provide paint colors that will create a bold contrast. For example, use white paint on black or dark blue paper. Orange paint will really pop when used on bright blue paper.
- Plan a workshop where children can paint on a variety of different textures. For example, painting on felt represents an interesting experience. Painting on tree leaves is another great option. You may also explore painting on pieces of wood or crepe paper. Body paint can also be tested as part of this workshop.
- During the week, offer different types of painting workshops. Children will enjoy painting with paint that has been somewhat diluted, with very thick paint, with textured paint (to which sand or salt has been added), etc. Jell-O paint (mixture prepared by adding a small amount of water to Jell-O powder) is always fun for young painters.
- Provide a different type of paintbrush each day: very narrow, very wide, etc.
- Provide sponges, rollers, cookie cutters, stampers, and cut squash. Children will love using these tools for painting. Of course, they can also use their hands (and even their feet)!
- Hang a large piece of paper on the wall and encourage children to paint all over it. You can have them try to paint with their back to the wall. They will find it challenging to paint without seeing what they are doing.
- Invite children to paint with their feet. To create their masterpiece, they will have to hold a paintbrush with their toes instead of their fingers. They can also press their feet in paint and then on the paper. With their toes pointing downwards, their footprints will look a lot like ghosts.
- Enjoy a finger painting workshop. Provide tactile paper and several finger paint colors. Let children paint freely.
- Plan a color combination workshop. (Open color combinations) Print, laminate, and display where children can see it. Provide glasses of water, food coloring, and small spoons. Let them try to create several different colors.
- Organize a bubble painting workshop. Add a few drops of food coloring to your homemade bubble solution. Have children create their own bubble-blowing tools using pipe cleaners. Set pieces of white paper on the table and invite children to blow colorful bubbles on the paper. Sit back and watch pastel designs appear.
- Plan a rainbow-colored workshop. Encourage children to use rainbow-colored waxed crayons on tactile paper. When they are done, have them paint all over their paper with black paint. Set their work aside to dry. Once it dry, show them how they can use the wooden tip of a paintbrush to scratch the paint and reveal the rainbow colors.
- In this workshop, children will explore colors. (Open picture game-Colors) Print, laminate, and cut out the cards and set them face down on a table, in rows. The first player turns two cards. If they are identical, he may keep them and play again. If not, he must turn them over and his turn is over. Make sure the other players were given the chance to see the colors. The object of the game is to find the most pairs.
- Little painters will love this workshop. Fill buckets with water and provide big paintbrushes (used to paint walls). Children will have fun painting various structures in your yard (fences, play structures, tables, benches, etc.).
- Prepare the necessary material for a workshop in which children will have fun painting on fabric. Encourage children to paint on pillowcases, a sweater, felt, etc. Invite them to paint a Halloween-related character or item.
- For this workshop, you will need small pieces of wood that are lightweight. Use a drill to create a hole at the top of each one, big enough to thread a ribbon or string through it. Let children paint freely on the pieces of wood.
- This creative workshop involves many steps. Go for a walk with your group and ask each child to find a rock. Let them wash their rock and set them all out to dry in the sun. Once dry, children paint their rock.
- This creative workshop requires paper plates. Have children paint the paper plates. Once they are dry, use them to create a garland that can be hung in your daycare.
- Provide several different paint colors as well as a huge piece of cardboard. Let children use paintbrushes to paint on the cardboard. They can mix colors to create spectacular Halloween fireworks.
- Window painting workshop. Let children paint on your daycare windows using paint that you have diluted with a little water and dishwashing liquid. When they are done, use scrapers to remove the paint.
- Freeze orange and black paint in ice cube trays. Insert a wooden stick in each section. Children will love painting with these homemade paint blocks. Let them use these unique painting tools to express their creativity.
- For this workshop, you will need clear document protectors. Separate each one so you have two sheets. Let children paint on them. When they are done, use a moist washcloth to wet the back of each sheet (unpainted side) and press them on a window. If you wish, you could have each child press his hands in paint and then on a clear plastic sheet.
- Organize a fun mud painting workshop. With your group, use small shovels to fill a bin with dirt or sand. Add water and stir to create mud. Provide paintbrushes and let them paint with the mud. When they are done, use a hose to wash their muddy designs away.
- Plan a sand painting workshop. Have children mix sand into several colors of poster paint. Divide the colors among several empty dishwashing liquid bottles. Children will enjoy squeezing the sand paint onto paper to create fun Halloween designs.
HALLOWEEN-CREATIVE WORKSHOPS-DRAWING
(Open poster-Halloween-Creative workshops-Drawing) Print, laminate, and display to identify your workshop.
Inventory-Halloween-Creative workshops
(Open inventory-Halloween-Creative workshops-Drawing) Print and insert this sheet in your thematic bin. Use it to inventory the contents of your bin. Add a variety of items such as: crayons, chalk, markers, notebooks, chalkboards or dry-erase boards, stamps, stamp pads, papers, pens, stencils, Halloween coloring pages, etc.
Planning chart-Halloween-Creative workshops
(Open planning chart-Halloween-Creative workshops) Print, laminate, and use with a dry-erase marker so you can use this chart year after year. This indispensable tool will help you prepare and create the material needed for the workshops you wish to offer. It will also simplify the organization of your environment and help you plan per children’s interests. What’s more, you can use the chart to assess and analyze the activities you present on a daily or weekly basis.
Follow-up booklet-Halloween-Creative workshops
(Open follow-up booklet-Halloween-Creative workshops) Print for each child. This follow-up booklet will help you gain a better understanding of what children are learning in each workshop.
Creative workshop suggestions-Drawing
- This workshop is simple, yet fun. Let children use crayons to draw on a variety of surfaces such as a large cardboard box, paper plates, paper, cardboard, a chalkboard, etc.
- Hang a large piece of paper on a wall and invite children to draw on it. Set a large piece of paper on a table and encourage children to stand around the table to draw on it. Outside or in a hallway, set large pieces of cardboard here and there (propped up or simply set on the ground) to provide children with new surfaces to draw on.
- Focus on one color at a time. Provide different types of crayons and pencils, but all in the same color. Invite children to draw on Halloween-themed paper. Display their work on a wall.
- For this workshop, set up your material in a way that encourages children to work as a team. For example, hang a single piece of paper on a wall. You can invite children to work with a partner by setting a single piece of paper on a table for two children. Very young children can sit in their highchair. Set a piece of paper and crayons on their highchair tray.
- Have children sit in a circle. Give one child a piece of paper and crayons. Invite him to draw on the paper while you play Halloween music. When the music stops, the child must stop drawing and hand the paper and crayons to the child sitting next to him. This second child continues the drawing until the music stops again and so on. The result is always fun to see!
- For this workshop, provide Halloween papers and crayons. Set a timer for 5 minutes. When you say “go”, children begin drawing. When the timer rings, they must stop drawing, even if they are not done. Let each child present his drawing to the group.
- Plan an “opposites” drawing workshop. Have children draw on black paper using white chalk. When they are done, have them reproduce their first drawing using a black marker on white paper.
- Print several Halloween-themed coloring pages in the educatall club and let children color them freely using waxed crayons, wooden coloring pencils, markers, etc.
- I can draw myself workshop. Provide a face outline for each child. (Open face outline) Hand children mirrors they can use to notice their facial features and help them draw their eyes, nose, mouth, etc.
- Mandalas foster concentration. You will find several mandalas in the educatall club. Print the ones you prefer and set the on a table. Children can color them whenever they feel they need to relax.
- A workshop to help children understand if they are righthanded or lefthanded. Begin by showing children how they have a left hand and a right hand. Ask them to draw something using their left hand and then with their right hand. You may use two pieces of paper per child or, divide one sheet of paper into two equal sections. Write on each paper or section which hand children used to draw.
- Organize a silly workshop where children must use a different body part (other than their hand) to draw. They may use their toes, their knee, their elbow, etc. The results may surprise you!
- Set a large piece of paper on the floor and invite a child to lie on it. Trace the contour of his body. Cut out the shape and hang it on a wall. Let the child decorate his silhouette using markers, fabric, wooden colored pencils, etc.
- Plan a scented workshop. You will need scented markers that children can use to draw. Encourage them to identify the different scents.
HALLOWEEN-CREATIVE WORKSHOPS-THEATER
(Open poster-Halloween-Creative workshops-Theater) Print, laminate, and display to identify your workshop.
Inventory-Halloween-Creative workshops
(Open inventory-Halloween-Creative workshops-Theater) Print and insert this sheet in your thematic bin. Use it to inventory the contents of your bin. Add a variety of items such as: old clothing items, wigs, hooks for hats, baseball caps, scarves, jewellery, costumes, baskets, etc. You can also create a special theater area using a large cardboard box. Paint and decorate it with your group to make it look like a stage. You may hang tiny Christmas lights in it. Add curtains and make sure there is a mirror nearby so children can admire their theatrical outfits and faces. You could have fun practicing a short play or acting out the lyrics of a song with your group. Theater is a great way to foster all aspects of childhood development.
Planning chart-Halloween-Creative workshops
(Open planning chart-Halloween-Creative workshops) Print, laminate, and use with a dry-erase marker so you can use this chart year after year. This indispensable tool will help you prepare and create the material needed for the workshops you wish to offer. It will also simplify the organization of your environment and help you plan per children’s interests. What’s more, you can use the chart to assess and analyze the activities you present on a daily or weekly basis.
Follow-up booklet-Halloween-Creative workshops
(Open follow-up booklet-Halloween-Creative workshops) Print for each child. This follow-up booklet will help you gain a better understanding of what children are learning in each workshop.
Creative workshop suggestions-Theater
- Encourage children to invent and practice a short Halloween show or play.
- Plan a workshop around mimes. Explain to your group what a mime is and invite them to pretend they are going up or down stairs, pulling on a rope, climbing a tree, walking in the forest, etc.
- Explore shadow puppets with your group. Hang a large white bedsheet from the ceiling. Show children how they can represent animals (ex. frog). They will have fun guessing what different shadows represent. You can use your hands or cut shapes out of cardboard and glue Popsicle sticks or wooden skewers behind them to make holding them easier.
- Provide face paints and makeup and enjoy a Halloween face painting workshop with your group. Encourage children to team up with a friend. They will have fun painting their partner’s face.
- Giant puppet workshop. Divide your group into pairs and give each child a large piece of paper. Have children take turns tracing their partner’s silhouette using waxed crayons. When they are done, have children decorate and cut out what will become giant puppets. Display them on a wall.
- Improvisation workshop. Depending on the ages of the children in your group, explore short sketches children can act out.
- Role play workshop. Set an easel, a paint palette, a few paint samples, coloring pages, and paintbrushes in your theater area. Add a beret and a scarf that children can wear. They can take turns pretending they are well-known artists. Encourage them to create pretend Halloween-related masterpieces. Let each child present his work to the group.
- Collect all the musical instruments you can find. Set up a microphone and encourage children to play music to accompany a simple play (or song) that they are acting out.
HALLOWEEN-CREATIVE WORKSHOPS-MOSAICS/STAINED GLASS
(Open poster-Halloween-Creative workshops-Mosaics/Stained glass) Print, laminate, and display to identify your workshop.
Inventory-Halloween-Creative workshops
(Open inventory-Halloween-Creative workshops-Mosaics/Stained glass) Print and insert this sheet in your thematic bin. Use it to inventory the contents of your bin. Add a variety of items such as: crayons, chalk, markers, notebooks, chalkboards or dry-erase boards, stamps, stamp pads, papers, pens, stencils, Halloween coloring pages, stickers, Fun Foam shapes, etc.
Planning chart-Halloween-Creative workshops
(Open planning chart-Halloween-Creative workshops) Print, laminate, and use with a dry-erase marker so you can use this chart year after year. This indispensable tool will help you prepare and create the material needed for the workshops you wish to offer. It will also simplify the organization of your environment and help you plan per children’s interests. What’s more, you can use the chart to assess and analyze the activities you present on a daily or weekly basis.
Follow-up booklet-Halloween-Creative workshops
(Open follow-up booklet-Halloween-Creative workshops) Print for each child. This follow-up booklet will help you gain a better understanding of what children are learning in each workshop.
Creative workshop suggestions-Mosaics/Stained glass
- Halloween mandalas. (Open mandalas-Halloween) Print for each child and encourage your group to color the mandalas using Halloween colors.
- Children love stickers and will therefore enjoy this workshop. Purchase several different sticker books and set large pieces of cardboard on a wall. Let children use the stickers to create mosaics.
- Gather recycled materials children can use to create a three-dimensional mosaic. Have them glue the items on a large piece of cardboard (this activity can also be done outdoors).
- Plan a creative workshop where children represent a mosaic using Jell-O cubes. Prepare four packages of Jell-O using containers large enough for the preparation to be approximately 1 cm thick. Once the Jell-O is set, cut it into squares. For dessert, invite children to form a mosaic by arranging four Jell-O squares (different colors) on a plate. Serve cookies and milk with their edible mosaic.
- For this workshop, you will need several tongs (different sizes) and a variety of mosaic pieces. Invite children to use the tongs to pick up the mosaic pieces and set them in a container. They will develop their fine motor skills throughout this workshop.
- Cut several square pieces of tissue paper (different colors). Using “Mod Podge” or diluted white glue, let children glue the pieces of paper on clear paper, overlapping them. Let dry and display their mosaics in a window for everyone to admire.
- Visit your local hardware store to find paint samples. Cut them into tiny squares and use them to create colorful mosaics with your group.
- Collect several scraps of paper and cardboard that you can tear into pieces. Use the pieces to create a colorful mural with your group.
- Grate old waxed crayons, dividing colors. Have children sprinkle the pieces of grated wax on waxed paper. Cover them with a second piece of waxed paper. Use an iron to melt the wax. Cut shapes out of the waxed paper and hang them in front of a window.
- For this workshop, cut a piece of adhesive paper and invite children to press different types of paper (tissue paper, cardboard, cellophane, etc.) all over. Press a second piece of adhesive paper over their work and display your stained glass in a window.
HALLOWEEN-CREATIVE WORKSHOPS-WRITING
(Open poster-Halloween-Creative workshops-Writing) Print, laminate, and display to identify your workshop.
Inventory-Halloween-Creative workshops
(Open inventory-Halloween-Creative workshops-Writing) Print and insert this sheet in your thematic bin. Use it to inventory the contents of your bin. Add a variety of items such as: notebooks, chalkboards, stamps, stamp pads, chalk, pencils, crayons, pens, activity sheets related to the theme, etc.
Planning chart-Halloween-Creative workshops
(Open planning chart-Halloween-Creative workshops) Print, laminate, and use with a dry-erase marker so you can use this chart year after year. This indispensable tool will help you prepare and create the material needed for the workshops you wish to offer. It will also simplify the organization of your environment and help you plan per children’s interests. What’s more, you can use the chart to assess and analyze the activities you present on a daily or weekly basis.
Follow-up booklet-Halloween-Creative workshops
(Open follow-up booklet-Halloween-Creative workshops) Print for each child. This follow-up booklet will help you gain a better understanding of what children are learning in each workshop.
Creative workshop suggestions-Writing
- In preparation for this workshop, print and laminate the following document (Open word flashcards-Halloween). Set the flashcards in the centre of your parachute or on a blanket. Children hold on to the edges and when you give the signal, raise the parachute to send the flashcards flying in the air. As the word flashcards fall back down, children collect them and have fun trying to “read” the words.
- For this workshop, children pretend they are illustrators. Provide stamps, stamp pads, envelopes, boxes, wrapping paper, pens, rulers, bags, and pieces of cardboard they can use to create illustrations.
- Set old computer keyboards or typewriters on a table. During this workshop, children have fun pretending they are reporters typing their latest story.
- In your daycare, invite children to search for toys on which they see letters or words. Have them bring them to you one at a time. Help them identify the letters and words.
- Provide pens, pencils, writing books, stationery, alphabet stencils, and envelopes. Invite children to write a letter that they can later mail to the daycare or to their parents.
- You will need black construction paper for this workshop. Have children glue alphabet pasta all over their paper. Variation: If you wish to use colorful pasta for this workshop or to create a special manipulation bin, mix 1 pint of alphabet pasta, 2 tablespoons of food coloring, and 3 tablespoons of rubbing alcohol. Seal the container and shake to coat the pasta with color. Spread the pasta out on a baking sheet to dry for several hours.
- To plan this workshop, ask children to tear pictures they like out of a Halloween coloring book. They could also tear pictures out of old, damaged storybooks. Cut the text portion if you are using illustrations from storybooks. With your group, arrange the illustrations in a row, as you wish. Encourage children to invent the story that could accompany the sequence of illustrations. Write their text below each illustration. Photocopy the illustrations and the text and help children use ribbon to create a book. Send a copy of your group’s original story home with each child at the end of the day.
- Provide Alpha Bits cereal and invite children to use the cereal to represent words.
HALLOWEEN-CREATIVE WORKSHOPS-SCULPTING
(Open poster-Halloween-Creative workshops-Sculpting) Print, laminate, and display to identify your workshop.
Inventory-Halloween-Creative workshops
(Open inventory-Halloween-Creative workshops-Sculpting) Print and insert this sheet in your thematic bin. Use it to inventory the contents of your bin. Add a variety of items such as: modeling dough, cookie cutters, kitchen utensils, aprons, oven mitts, utensils, cake pans, rolling pins, flour, a sugar bowl, an egg beater, wooden spoons, measuring cups, measuring spoons, etc.
Planning chart-Halloween-Creative workshops
(Open planning chart-Halloween-Creative workshops) Print, laminate, and use with a dry-erase marker so you can use this chart year after year. This indispensable tool will help you prepare and create the material needed for the workshops you wish to offer. It will also simplify the organization of your environment and help you plan per children’s interests. What’s more, you can use the chart to assess and analyze the activities you present on a daily or weekly basis.
Follow-up booklet-Halloween-Creative workshops
(Open follow-up booklet-Halloween-Creative workshops) Print for each child. This follow-up booklet will help you gain a better understanding of what children are learning in each workshop.
Creative workshop suggestions-Sculpting
- You will need uncooked spaghetti and miniature marshmallows. Ask children to use them to create all kinds of Halloween sculptures. Display their creations.
- Provide black and orange modeling dough. Set the dough in the center of the table and invite children to create different Halloween sculptures together.
- Provide salt dough. Let children create Halloween sculptures. Set them out to dry and invite children to paint them.
- Set a large container filled with water and dirt on the floor. Children will enjoy manipulating the mud with their hands and using it to sculpt various Halloween characters.
- Ice sculptures. Set a large block of ice in a bin on a table and invite children to use spoons to scrape it.
- Jell-O sculpting. Let children manipulate the contents of a bin filled with orange Jell-O cubes. Let them try to sculpt the Jell-O.
- Clay sculptures. Give each child a small block of clay and let them sculpt simple Halloween shapes, a pencil holder, a small plate… Let dry.
- Ecological sculptures. Using recycled items (metal cans, yogurt containers, empty toilet paper rolls, bread ties, etc.), encourage children to create a Halloween sculpture. Help them hold the items together with hot glue or any other adhesive. You can decide to have them work together to create one large sculpture or each child can sculpt his own. Display their work.
- Original sculptures. Wet towels and washcloths and hang them outside for a few hours on a cold day (or set them in the freezer). Once they are frozen, show children how they can bend them in every direction to “sculpt” them.
- Manipulation workshop. Begin by providing modeling dough alone, without any accessories. Show children how they can knead the dough, tear it, flatten it, etc. After a while, add a few accessories to prolong the duration of this workshop.
- Color exploration workshop. Often, we prevent children from mixing colors of modeling dough. This is a wonderful activity. Give each child two colors of homemade modeling dough and let them manipulate them until the color is uniform.
- Children enjoy manipulating different objects that can be used to make impressions in modeling dough. With them, experiment with different fabrics such as denim or burlap. The top of a shoe, tree leaves, and large stampers are also interesting for this activity.
- Roll a variety of round objects (ball, rolling pin, etc.) on modeling dough. Add essential oils to your homemade modeling dough to call upon children’s sense of smell throughout this activity.
- Modeling dough is a great tool that can help children learn to manipulate scissors. Small plastic knives can also be used to cut modeling dough.
HALLOWEEN-CREATIVE WORKSHOPS-PHOTOGRAPHY
(Open poster-Halloween-Creative workshops-Photography) Print, laminate, and display to identify your workshop.
Inventory-Halloween-Creative workshops
(Open inventory-Halloween-Creative workshops-Photography) Print and insert this sheet in your thematic bin. Use it to inventory the contents of your bin. Add a variety of items such as: toy cameras, photo albums, old pictures, bedsheets and posters (for creating backgrounds), etc.
Planning chart-Halloween-Creative workshops
(Open planning chart-Halloween-Creative workshops) Print, laminate, and use with a dry-erase marker so you can use this chart year after year. This indispensable tool will help you prepare and create the material needed for the workshops you wish to offer. It will also simplify the organization of your environment and help you plan per children’s interests. What’s more, you can use the chart to assess and analyze the activities you present on a daily or weekly basis.
Follow-up booklet-Halloween-Creative workshops
(Open follow-up booklet-Halloween-Creative workshops) Print for each child. This follow-up booklet will help you gain a better understanding of what children are learning in each workshop.
Creative workshop suggestions-Photography
- For this workshop, ask parents for pictures from past Halloweens. Cut the pictures and glue them on 10 cm x 13 cm pieces of paper. Arrange the pictures in plastic Ziploc bags. You can insert two pictures back to back in each bag. Staple the bags together at the sealed end so you can open them if necessary. Use colorful adhesive tape to cove the staples. Let children manipulate this original photo album.
- Let children take turns being the group’s photographer. The other children dress up, pretend to apply makeup and find original poses that the photographer can pretend to capture with a toy camera. After a while, invite the photographer to draw his favorite pose.
- Set a mirror in your dress-up area. Add several hats, masks, necklaces, and other accessories children can use to create unique characters. If possible, photograph your group when they are all dressed up, print the pictures, and display them.
- Use your camera and pretend you are a photographer throughout the day. Take pictures of each child. Print them and use them to create a special photo album representing your group’s daily routine.
- (Open model-camera) Print the model, trace it on heavy paper and cut it out. Each child will have his own “camera”. Encourage children to use it to capture an activity they enjoyed during the day. (Open model-picture) Print. Invite children to draw the activity they liked most, as if they had photographed it.
HALLOWEEN-CREATIVE WORKSHOPS-MUSIC
(Open poster-Halloween-Creative workshops-Music) Print, laminate, and display to identify your workshop.
Inventory-Halloween-Creative workshops
(Open inventory-Halloween-Creative workshops-Music) Print and insert this sheet in your thematic bin. Use it to inventory the contents of your bin. Add a variety of items such as: musical instruments, microphones, costumes, a mirror, a tape recorder, songbooks, sheet music, etc.
Planning chart-Halloween-Creative workshops
(Open planning chart-Halloween-Creative workshops) Print, laminate, and use with a dry-erase marker so you can use this chart year after year. This indispensable tool will help you prepare and create the material needed for the workshops you wish to offer. It will also simplify the organization of your environment and help you plan per children’s interests. What’s more, you can use the chart to assess and analyze the activities you present on a daily or weekly basis.
Follow-up booklet-Halloween-Creative workshops
(Open follow-up booklet-Halloween-Creative workshops) Print for each child. This follow-up booklet will help you gain a better understanding of what children are learning in each workshop.
Creative workshop suggestions-Music
- For this creative workshop, ask a child to pick a song he knows and hum the first line. If that isn’t enough for the others to guess the song, encourage him to continue. You may also be the one who hums a song for your group.
- For this workshop, invite children to create their very own guitar using an empty shoebox. Cut a hole out of the top of the box (diameter of approx. 8 cm) and put it back on the box. Give each child six rubber bands (different sizes) they can slide over the opening on their box. Show them how they can pinch the rubber bands to create guitar-like sounds.
- Musical bottles. Use empty soda bottles to create music. Simply hold the bottles in front of your lips and gently blow over the opening. Create different notes by filling the bottles with different levels of water.
- Make rice-filled maracas. Give each child two empty toilet paper rolls. Seal one end of each roll with adhesive tape. Encourage children to pour rice into each roll so they are half-full. Children can hold their rolls while you seal the opposite ends. Let children draw on their maracas and decorate them as they wish. Use your maracas to create different rhythms.
- For this workshop, record the children in your group individually. They can sing or speak. Play back the recordings and encourage children to identify each voice. Variation: Encourage children to make monster sounds with their voice.
- For this workshop you will need eight glass jars. Leave one jar empty and fill the remaining jars with different levels of water. The last jar must be full. Add a few drops of food coloring to the water to make it easier for children to see the water levels. Let children tap the jars with a wooden spoon and a metal spoon to discover different sounds. Line the jars up in order (per water level). Which jar produces the most high-pitched/low-pitched sound? Variation: You could add a variety of different containers, such as a metal can, a cardboard box, and plastic containers to create other types of sounds.
- Give each child a scarf. Alternate between playing soft and very fast-paced music. Encourage children to move the scarves to the beat of the music. Show children how they can toss their scarf in the air, spin it around in circles, etc. Invite children to stand in a circle holding their scarves instead of holding hands. They can trade scarves every time the music stops.
HALLOWEEN-CREATIVE WORKSHOPS-SEWING
(Open poster-Halloween-Creative workshops-Sewing) Print, laminate, and display to identify your workshop.
Inventory-Halloween-Creative workshops
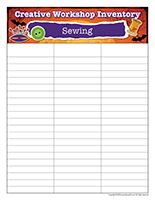
(Open inventory-Halloween-Creative workshops-Sewing) Print and insert this sheet in your thematic bin. Use it to inventory the contents of your bin. Add a variety of items such as: different colors of thread, empty spools, rulers, chalk, buttons, fabric, elastic, tracing paper, clothing items, a toy sewing machine, plastic needles, sewing kits, Velcro, scissors, zippers, catalogues, thimbles, etc.
Planning chart-Halloween-Creative workshops
(Open planning chart-Halloween-Creative workshops) Print, laminate, and use with a dry-erase marker so you can use this chart year after year. This indispensable tool will help you prepare and create the material needed for the workshops you wish to offer. It will also simplify the organization of your environment and help you plan per children’s interests. What’s more, you can use the chart to assess and analyze the activities you present on a daily or weekly basis.
Follow-up booklet-Halloween-Creative workshops
(Open follow-up booklet-Halloween-Creative workshops) Print for each child. This follow-up booklet will help you gain a better understanding of what children are learning in each workshop.
Creative workshop suggestions-Sewing
- Organize a sewing workshop. Provide fabric scraps, old clothing items, scissors, and tape measures and let children pretend they are seamstresses. They can shorten clothing items, remove buttons, take seams apart, etc.
- Shoe designer workshop. Give each child two empty shoeboxes and let them use the boxes to design unique shoes. Help them punch two series of three or four holes out of each box using a hole-punch. They can thread shoelaces through the holes. Provide a variety of materials children can use to decorate their shoes. Variation: Ask children to bring an old shoe to daycare and let them paint and decorate it. They can add wiggly eyes, feathers, buttons, etc. Display children’s creations on a shelf.
- A unique creative workshop. Give each child a brown paper bag. Cut three holes out of each child’s bag (two armholes and a hole for their head). Let children decorate their sweater as they wish using ribbon and fabric scraps. Variation: Ask children to bring a plain white t-shirt to daycare and let them decorate it with fabric paint or use transfer paper to transfer a design of their choice to their sweater.
- Pant design workshop. Cut the back and front of a pair of pants out of a roll of paper for each child. Staple both parts together and cut a slit in the center. Let children draw details on their paper pants. Variation: Ask children to bring an old pair of pants to daycare and let them decorate them with fabric paint, sequins, fabric scraps, etc.
- Haute couture creative workshop. Divide your group into pairs. One child from each pair will be the model whereas the other child will be the designer. The designers pick clothing items out of your costume bin and use them to dress their model. Plan a quick fashion show.
HALLOWEEN-CREATIVE WORKSHOPS-DANCING
(Open poster-Halloween-Creative workshops-Dancing) Print, laminate, and display to identify your workshop.
Inventory-Halloween-Creative workshops
(Open inventory-Halloween-Creative workshops-Dancing) Print and insert this sheet in your thematic bin. Use it to inventory the contents of your bin. Add a variety of items such as: ribbons, scarves, hula hoops, music, ballet slippers, tap shoes, a mirror, tutus, dresses, hats, etc.
Planning chart-Halloween-Creative workshops
(Open planning chart-Halloween-Creative workshops) Print, laminate, and use with a dry-erase marker so you can use this chart year after year. This indispensable tool will help you prepare and create the material needed for the workshops you wish to offer. It will also simplify the organization of your environment and help you plan per children’s interests. What’s more, you can use the chart to assess and analyze the activities you present on a daily or weekly basis.
Follow-up booklet-Halloween-Creative workshops
(Open follow-up booklet-Halloween-Creative workshops) Print for each child. This follow-up booklet will help you gain a better understanding of what children are learning in each workshop.
Creative workshop suggestions-Dancing
- Rhythmic ribbon creative workshop. Collect empty paper towel rolls. You will need one per child. Use tissue paper to create rhythmic ribbons. Simply cut strips of tissue paper and staple them to one end of a paper towel roll. Let children decorate the cardboard tube with paint and pieces of colorful paper.
- Dance costume creative workshop. You will need rope or elastic fabric. For each child, cut a piece long enough to fit around his or her waist. Provide ribbon and strips of tissue paper or construction paper children can use to create their dance costume. They can wear it for dancing activities throughout the week.
- Creative dancing workshop. Play traditional music and show children a few line dancing moves.
- Use cones and different obstacles to create a course within your daycare. Invite children to dance from one end of the course to the other end, going around the various obstacles along the way.
- Creative movement workshop. Ask children to form a circle and hold hands. Insert a hula hoop between two children and close off the circle once again. The object of the game is for the hula hoop to make it all the way around the circle, but children cannot let go of their friends’ hands. They must find a way!
- Outdoor aerobics workshop. Play dance music and perform a series of exercises to the beat. Children will enjoy exercising on the grass or snow.
- Hula hoop creative workshop. Hand each child a colorful hula hoop and let them practice spinning it around their waist. Who can keep it moving the longest?
- Tap dancing workshop. Invent original tap dance moves with your group.
HALLOWEEN-CREATIVE WORKSHOPS-COOKING
(Open poster-Halloween-Creative workshops-Cooking) Print, laminate, and display to identify your workshop.
Inventory-Halloween-Creative workshops
(Open inventory-Halloween-Creative workshops-Cooking) Print and insert this sheet in your thematic bin. Use it to inventory the contents of your bin. Add a variety of items such as: plastic dishes, plastic utensils, wooden spoons, cutting boards, funnels, sieves, plastic food items, a kitchen scale, refrigerator magnets, felt fruits and vegetables, scented markers and modeling dough, oven mitts, tablecloths, placemats, aprons, chef hats, empty food containers, etc.
Planning chart-Halloween-Creative workshops
(Open planning chart-Halloween-Creative workshops) Print, laminate, and use with a dry-erase marker so you can use this chart year after year. This indispensable tool will help you prepare and create the material needed for the workshops you wish to offer. It will also simplify the organization of your environment and help you plan per children’s interests. What’s more, you can use the chart to assess and analyze the activities you present on a daily or weekly basis.
Follow-up booklet-Halloween-Creative workshops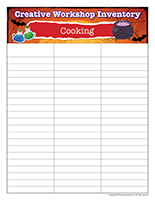
(Open follow-up booklet-Halloween-Creative workshops) Print for each child. This follow-up booklet will help you gain a better understanding of what children are learning in each workshop.
Creative workshop suggestions-Cooking
- For this workshop, fill several containers with water. Provide different tools in each one: measuring cups, spoons, funnels, etc. Children will have fun transferring water from one container to the next.
- Find items normally used in the kitchen that can be used to make music. Use pots and pans as drums with wooden spoons. Fill jars with water and tap them with metal spoons, etc. This is a simple rhythmic workshop.
- For this workshop, provide different types of dry pasta that can be threaded on string. Invite children to use them to create unique necklaces. You can color your dry pasta by adding it to a Ziploc bag with a few drops of paint. Shake the contents of the bag and spread it on a cookie sheet to dry.
- A made-to-measure creative workshop. Fill a bin with rice. Add a few measuring cups, utensils, and containers (different sizes). Set a few empty containers on the table, next to the bin. Place a rubber band around each one to indicate the level to which each container must be filled. Once the containers have all been filled with rice, encourage children to place them in order, from the one containing the least rice to the one containing the most rice. Variation: Fill the bin with dry cereal instead of rice.
- Bakery role play workshop. Provide utensils, white modeling dough, rolling pins, placemats, bread pans, baker hats, cookie cutters, etc. Let children pretend they are bakers.
- At the supermarket role play workshop. You will need a cash register, pretend money, baskets, plastic food items, empty food containers, brown paper bags, store clerk uniforms (shirts, hair nets). Let children pretend they are supermarket employees and customers.
- Restaurant role play workshop. You will need menus, placemats, tables, chairs, salt and pepper shakers, napkins, utensils, a pencil and a small notebook, plastic food items, dishes, a cash register, and pretend money. Let children pretend they are restaurant employees or customers.
- Chef role play workshop. Children pretend they are chefs. Make sure you have a chef hat, aprons, casseroles, oven mitts, cookie sheets, etc. for everyone.
HALLOWEEN-CREATIVE WORKSHOPS-MAGIC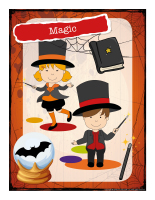
(Open poster-Halloween-Creative workshops-Magic) Print, laminate, and display to identify your workshop.
Inventory-Halloween-Creative workshops
(Open inventory-Halloween-Creative workshops-Magic) Print and insert this sheet in your thematic bin. Use it to inventory the contents of your bin. Add a variety of items such as: magician hats, magic wands, stuffed rabbits, star-shaped cookie cutters for cutting stars out of contruction paper, etc.
Planning chart-Halloween-Creative workshops
(Open planning chart-Halloween-Creative workshops) Print, laminate, and use with a dry-erase marker so you can use this chart year after year. This indispensable tool will help you prepare and create the material needed for the workshops you wish to offer. It will also simplify the organization of your environment and help you plan per children’s interests. What’s more, you can use the chart to assess and analyze the activities you present on a daily or weekly basis.
Follow-up booklet-Halloween-Creative workshops
(Open follow-up booklet-Halloween-Creative workshops) Print for each child. This follow-up booklet will help you gain a better understanding of what children are learning in each workshop.
Creative workshop suggestions-Magic
- Design an obstacle course that children must complete in the dark. Set different items that children can collect along the course. Try to find items related to magic such as a wand, a magician’s hat, a rabbit, a bird, a playing card, etc.
- During this creative workshop, organize a treasure hunt where children must find the ingredients of the magician’s magic potion.
- Plan a creative workshop with your parachute. Children can hide under it to disappear like a rabbit in a magician’s hat.
- Organize activities in the dark with flashlights. You can also provide glowsticks.
- Teach children simple magic or juggling tricks.
- Plan a creative workshop that involves manipulation bins (feathers, sand, dry cereal). Insert laminated stars and invite children to search for them. Name the color of each star.
- Set a variety of objects on the table (a star, a magic wand, etc.). Children observe the items for one minute. Cover them with a dark blanket and remove one or two things. Pull the blanket away and have children identify the missing object(s).
- For this creative workshop, set several items on a table (nail, paperclip, money, rubber band, aluminum piece, crayon, plastic block, lipstick, etc.). Set a magnet next to each item, one at a time to see which ones are attracted to it. Help children understand that metals are attracted to magnets.
Have fun!
The educatall team
 Home
Home Theme activities
 Babies and toddlers
 Arts and crafts
 Science
 Creative recipes
 Tips and tricks
 Special needs
 Extra activities
 Educ-TV
 Newsletter
  Online store
 Educatall club


