AREA SETUP
Thematic Poster
(Open thematic poster-Halloween-Decorations) Print and use the poster to present your theme and decorate your daycare.
SPECIAL TOOL
Banner-Happy Halloween
This tool was created in response to a special request received. (Open banner-Happy Halloween) (Open banner-Happy Halloween-Small) Print and display within your daycare or in your circle time area.
PICTURE GAME
Picture game-Halloween-Decorations
The pictures may be used as a memory game or to spark a conversation with the group. Use them to decorate the daycare or a specific thematic corner. (Open picture game-Halloween-Decorations) Print, laminate, and store in a “Ziploc” bag or in your thematic bins.
LANGUAGE ACTIVITIES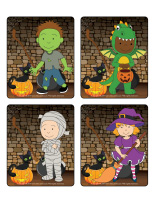
Word flashcards
Use the flashcards to spark a conversation with your group, in your reading and writing corner, or to identify your thematic bins. (Open word flashcards-Halloween-Decorations) (Open giant word flashcards-Halloween-Decorations) Halloween, decorations, craft, orange, black, garland, pumpkin, scarecrow, owl, streamers, balloons, broom
SPECIAL ACTIVITIES-THEMATIC LETTER-HALLOWEEN-DECORATIONS
We have prepared a series of thematic letters that you can print and use as you wish. Place a letter in your mailbox and once children discover it, read it to them and enjoy the suggested activities.
Puppets-Igor the master of décor
(Open puppets-Igor the master of décor) Print the puppet and use it to read the thematic letters to your group.
Mailbox-Halloween-Decorations
Set up a special Halloween mailbox area. Every morning, invite children to check the mailbox to see if Igor left a message for them. (Open poster-Mailbox-Halloween) Print and display to decorate your Halloween mailbox area. Use the mailbox for the delivery of Igor’s letters.
Mailbox ideas:
- Purchase the mailbox available on the educatall.com online store and decorate it for Halloween.
- Use a cardboard box (shoebox, cereal box, etc.) and transform it to make it look like a mailbox. Decorate it for Halloween.
- Recycle an empty metal or plastic coffee can and transform it to represent your Halloween mailbox.
- Hang a gift bag on a hook or door handle. Identify it so people know it’s your Halloween mailbox.
Thematic letter-Halloween-Decorations-Activity 1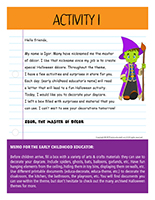
(Open thematic letter-Halloween-Decorations-Activity 1) Print the letter and make sure children find it during circle time. Read the letter to present the daily activity.
Hello friends,
My name is Igor. Many have nicknamed me the master of décor. I like that nickname since my job is to create special Halloween décors. Throughout the theme, I have a few activities and surprises for you. Each day, (early childhood educator’s name) will read a letter that will lead to a fun Halloween activity. Today, I would like you to decorate your daycare. I left a box filled with surprises and material that you can use. I can’t wait to see your decorations tomorrow!
Igor, the master of décor
Memo for the early childhood educator: Before children arrive, fill a box with a variety of arts & crafts materials they can use to decorate your daycare. Include spiders, ghosts, bats, balloons, garlands, etc. Have fun hanging elements from the ceiling, hiding them in toy bins, displaying them on walls, etc. Use different printable documents (educa-decorate, educa-theme, etc.) to decorate the cloakroom, the kitchen, the bathroom, the playroom, etc. You will find documents you can use within the theme, but don’t hesitate to check out the many archived Halloween themes for more.
Thematic letter-Halloween-Decorations-Activity 2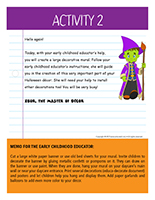
Crazy drawing fun
(Open thematic letter-Halloween-Decorations-Activity 2) Print the letter and add it to your Halloween mailbox.
Hello again!
Today, with your early childhood educator’s help, you will create a large decorative mural. Follow your early childhood educator’s instructions, she will guide you in this very important part of your Halloween décor. She will need your help to install other decorations too! You will be very busy!
Igor, the master of décor
Memo for the early childhood educator: Cut a large white paper banner or use old bed sheets for your mural. Invite children to decorate the banner by gluing metallic confetti or pompoms on it. They can draw on the banner or use paint. When they are done, hang your mural on your daycare’s main wall or near your daycare entrance. Print several decorations (educa-decorate document) and posters and let children help you hang and display them. Add paper garlands and balloons to add even more color to your décor.
Thematic letter-Halloween-Decorations-Activity 3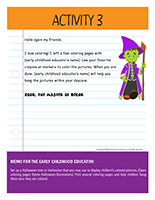
(Open thematic letter-Halloween-Decorations-Activity 3) Print the letter and set it in your Halloween mailbox along with several Halloween coloring pages.
Hello again my friends,
I love coloring! I left a few coloring pages with (early childhood educator’s name). Use your favorite crayons or markers to color the pictures. When you are done, (early childhood educator’s name) will help you hang the pictures within your daycare.
Igor, the master of décor
Memo for the early childhood educator: Set up a Halloween tree or clothesline that you may use to display children’s colored pictures. (Open coloring pages theme-Halloween-Decorations) Print several coloring pages and help children hang them once they are colored.
Thematic letter-Halloween-Decorations-Activity 4
(Open thematic letter-Halloween-Decorations-Activity 4) Before children arrive, print the letter and place it in your mailbox.
Hello my decorating trainees,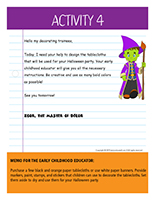
Today, I need your help to design the tablecloths that will be used for your Halloween party. Your early childhood educator will give you all the necessary instructions. Be creative and use as many bold colors as possible!
See you tomorrow!
Igor, the master of décor
Memo for the early childhood educator: Purchase a few black and orange paper tablecloths or use white paper banners. Provide markers, paint, stamps, and stickers children can use to decorate the tablecloths. Set them aside to dry and use them for your Halloween party.
Thematic letter-Halloween-Decorations-Activity 5
(Open thematic letter-Halloween-Decorations-Activity 5) Print the letter and set it in your mailbox along with a small treat for each child.
Boo!
Today, we will celebrate your decorating efforts! I hope you enjoyed your week. I know I loved spending time in your daycare. Now, it’s time for your Halloween party! Have fun!
Igor, the master of décor
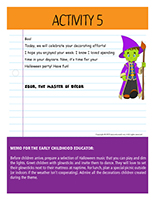
Memo for the early childhood educator: Before children arrive, prepare a selection of Halloween music that you can play and dim the lights. Greet children with glowsticks and invite them to dance. They will love to set their glowsticks next to their mattress at naptime. For lunch, plan a special picnic outside (or indoors if the weather isn’t cooperating). Admire all the decorations children created during the theme.
DAYCARE DECORATIONS
Educa-theme-Halloween-Decorations
(Open educa-theme-Halloween-Decorations) Print and laminate the letters and illustrations that represent the theme. They can be used to present the theme to children (and their parents) while decorating an area within your daycare.
Educa-decorate-Halloween-Decorations
(Open educa-decorate-Halloween-Decorations) Print, laminate, and cut out. Use the illustrations to decorate the walls of your daycare and set the mood for the theme.
Stickers-Halloween-Decorations
(Open stickers-Halloween-Decorations) Print the illustrations on adhesive paper and use them to create original stickers.
Pennants-Halloween-Decorations
(Open pennants-Halloween-Decorations) Print and let children cut out the pennants. Hang them within your daycare.
Models-Halloween-Decorations
(Open models-Halloween-Decorations) Print and let children decorate the items so they can use them to create a garland. Hang the garland within your daycare or near your daycare entrance.
Halloween circle time
Use adhesive paper to stick Halloween illustrations on the floor, forming a circle to delimit your circle time area. Before children arrive, you may also use pictures to create a path from your greeting area to your circle time area.
Halloween mural
Use black electrical tape to draw a tree outline on a wall (with no leaves). At your local dollar store, purchase several Halloween Fun Foam shapes. Let children decorate the tree with the shapes. They can use adhesive putty to press them on the tree branches. You can remove the shapes at the end of each day. Children will love decorating and redecorating the mural during periods of free play or as they wait for their peers to arrive in the morning.
Halloween tree
Give each child a tree branch and have them decorate an empty metal can. They can fill their can with sand so their branch can be inserted and remain upright. If you prefer, use a larger branch and a bucket to turn this into a group project. Children can paint their branch and sprinkle it with glitter before it dries. They will love hanging the many Halloween decorations they will create throughout the theme in their Halloween tree.
Halloween string
(Open Halloween string) Cut out the models. Deposit them on folded pieces of paper and cut them out, avoiding the edges. When you unfold your sheet of paper, the shapes will form a decorative chain.
Halloween door decorations
(Open door decorations-Halloween) Print, cut out, and laminate. Use the items to decorate your daycare doors.
Halloween tablecloth
Purchase a paper tablecloth. Cut Halloween designs or items out of magazines and flyers. Have children glue them on the tablecloth. You will have a perfect tablecloth for your Halloween party!
Halloween garland
Cut several strips of black and orange construction paper. Link them together, alternating colors. Hang the garland from the ceiling.
Miniature ghosts
Make a ball with one Kleenex and place it in the center of another Kleenex so it looks like a ghost head. Tie ribbon or string around the head and hang the ghosts from the ceiling. Children will enjoy making several of these. These ghosts are a very simple decoration to make!
The scarecrow
Gather old clothing items (shirt, pants, shoes, hat) and stuff them with fabric or other clothing items. Use a pumpkin for a head. You can use clothing from your costume box. Sit your scarecrow on a chair, indoors or outdoors.
Spiders
Join four pipe cleaners together in the centre so you have eight spider legs. Attach elastic string to the middle of the body. Children will love holding the end of the string and making up and down movements to make their spider dance!
Garland-Candy
(Open garland-Halloween candy) Print the illustrations. Let children decorate them. Cut them out and hang them within your daycare or near your daycare entrance to create a garland.
The candy wreath
Cut a wreath shape out of heavy cardboard. Have children paint it. Once the paint is dry, have them decorate the wreath by gluing all kinds of candy pieces on it.
Group identification-Halloween
(Open group identification-Halloween creatures) Print and display the items in specific areas within your daycare or in your circle time area.
Group picture frame
(Open picture frame-Halloween group of 6 or 9) Print and add a picture of each child. Laminate and send the frames home with children after your Halloween party.
Identification cards-Halloween
(Open identification cards-Halloween) Print and write the name of each child on a card. Use the cards to identify children’s personal belongings, cubbyholes, etc.
Room identification posters-Halloween
(Open room identification posters-Halloween) Print and use the posters to identify various areas.
Circle time
For Halloween, use orange electrical tape to draw a pumpkin shape on the floor, in your circle time area. Invite children to press Halloween stickers all over your pumpkin. Hang orange lights and a Halloween garland. You can make your own by looping strips of orange and black construction paper together. Hang pumpkins, witches, bats, and ghosts from the ceiling.
Door lighting
Hang Halloween lights around your daycare entrance. You can purchase pumpkin, ghost, or skeleton string lights at your local dollar store.
A special window
If you have a large window or patio door in your daycare, let children paint Halloween designs on it using washable paint. This activity can be somewhat messy, but the paint is easy to wash off when they are done. If you prefer, use a white paper banner.
Construction area
Use orange and black electrical tape to draw roads on your daycare floor and walls. Use adhesive paper to stick Halloween pictures along the roads. Add figurines.
Arts & crafts area
Hang a large piece of white paper on each wall, completely covering the surface. Let children decorate the walls as they see fit, using Halloween colors.
Reading corner
Create a haunted reading corner in a large cardboard box (appliance box). Hang an orange garbage bag cut into strips to represent a curtain. Add Halloween puppets and hang Halloween lights. Let children paint and decorate the outside of the box or, if you prefer, simply drape a Halloween-themed tablecloth over it.
Halloween workshops
(Open workshops-Halloween) Print and display to identify your workshops.
Windowsill decorations
Have children help you fill clear glasses or vases with colorful Halloween candy. You can, for example, use candy corn. Little ones will like using small measuring cups to transfer candy from a bin to your chosen containers. Set the containers filled with candy on a shelf or windowsill. During naptime or at the end of the day, when your daycare is dark, insert a glowstick vertically in each container. Children will have fun admiring their special Halloween lighting.
CEILING DECORATIONS
Halloween décor
Hang black and purple tulle from the ceiling, over your circle time area. Use invisible thread to hang Fun Foam bats over children’s head to create a special atmosphere.
Fun ceiling
Use colorful pumpkin shapes to create a mobile or simply stick Halloween pictures on the ceiling, over your changing table. You will find many pictures you can use in the educatall club.
Spider web
Give each child a ball of yarn. Tie the ends to different items in the daycare (chairs, furniture, etc.). Children become spiders and spin a giant spider web by unravelling their ball of yarn in every direction.
Silly ghosts
Inflate several white rubber gloves and use a permanent marker to draw a ghost face on each one. Hang them from the ceiling
Halloween lights
Hang a variety of Halloween lights from the ceiling. Use clothespins to hold them in place.
Halloween ceiling
Hang an old bed sheet or a square piece of fabric from the ceiling. Cut large holes and glue cardboard spiders all over your giant spider web.
Miniature ghosts
Make a ball with one Kleenex and place it in the centre of another Kleenex so it looks like a ghost head. Tie ribbon or string around the head and hang from the ceiling. Children will enjoy making seve
ral of these. These ghosts are a very simple decoration to make!
Halloween garland
Cut several strips of black and orange construction paper. Link them together, alternating colors. Hang the garland from the ceiling.
Spiders
Join four pipe cleaners together in the centre so you have eight spider legs. Attach elastic string to the middle of the body. Children will love holding the end of the string and making up and down movements to make their spider dance!
Pinata
Make a pumpkin-shaped pinata with your group. Stuff it with Halloween candy and surprises. Hang it from the ceiling and break it open during your Halloween party.
FLOOR DECORATIONS
My Halloween path
(Open my Halloween path) Print, laminate, and arrange the items on the floor to create a path that leads to various areas within your daycare. The Halloween path can lead to frequently visited areas such as the bathroom and cloakroom.
Halloween floor
Cut a large piece of adhesive paper. Remove the paper backing and set it on the floor, sticky side up. Visually separate the paper into two equal sections. On one side, add a few tablespoons of orange, black, and white paint. The quantity will depend on the size of your paper. Next, fold the paper in half. Use wide adhesive tape to secure the paint-filled “envelope” on the floor. Invite children to walk on the envelope to mix the paint colors together. If you wish, create several paint-filled envelopes. Be sure to check the envelopes for leaks regularly to avoid a mess.
Halloween walk
Print several Halloween pictures and arrange them on the floor throughout your daycare to create a path.
Monster footprints
Trace a pair of monster footprints on sponges and cut them out. You will have a left foot and a right foot. Press the monster footprints in washable paint and use them to make monster footprints on the floor, all over your daycare. Variation: If you prefer you can create black cat, ghost, witch, or spider footprints out of construction paper and stick them all over your floor and walls. You could also press your sponge footprints in flour instead of paint, but they will of course not last as long.
DAYCARE ENTRANCE OR CLOAKROOM DECORATIONS
Wrapped door
Purchase very wide ribbon, preferably black. Cut two pieces measuring approximately 50 cm each. Fold each piece and set the cut ends one on top of the other. Cut an even longer piece of ribbon (3-4 meters). Wrap it around the center of the overlapped pieces to create an oversized bow. Hang your bow over your daycare entrance and let the ribbon hang down either side of the door. If needed, use adhesive putty to hold the ribbon in the top corners so that it frames your door nicely. Invite children to press tiny Halloween stickers all over to complete your door decoration.
Witch cloakroom
(Open Halloween nametags) Print and use the nametags to decorate your cloakroom. If you have extra hooks that are not used in your cloakroom, reserve them for witches. Hang a witch hat and black cape on them (or just pieces of Halloween fabric). Collect several thin dead branches (broomstick length). Arrange a dozen or so branches together, wrapping them with black electrical tape approximately ¾ of the way down to make them look like the brooms witches ride. Set the brooms among the witch hats and capes.
Halloween cubbyholes
(Open picture frame-Halloween characters) Print for each child and use the frames to decorate their cubbyholes. If you wish, you could also photograph each child and transform the printed pictures to make them look like a Halloween character. For example, you could glue each child’s face on a ghost outline and let them decorate it.
Daycare entrance decoration
Cut two plastic tablecloths (black and orange) into strips vertically, leaving approximately 20-30 cm untouched at one end. Glue them over your daycare entrance to represent a curtain. Children will love walking through it as they arrive in the morning.
Candy wreath
Cut a wreath shape out of cardboard. Have children glue candy pieces on it. Hang it over your daycare entrance.
BATHROOM DECORATIONS
Blackbird facecloths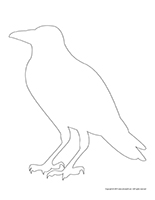
(Open blackbird) With your group, collect several dead branches. Paint the branches with black poster paint and set them aside to dry. Once the paint is completely dry, insert the branches in a black bucket filled with sand or rocks and deposit it in your bathroom. Purchase black facecloths at your local dollar store. Trace the blackbird model on each facecloth and cut out the shapes. Use tiny Halloween clothespins to hang the blackbirds in your tree. Children will love using them to wash their face after lunch.
Glow-in-the-dark bathroom
Purchase several glow-in-the-dark Halloween shapes and glue them all over the bathroom. When children use the bathroom, close the door so they can admire them. This may help some children be less afraid of the dark.
Halloween bathroom
Press tiny Halloween stickers on different items and accessories in your bathroom (footstool, toothbrush holder, changing table, diaper bin, etc.).
Climbing spiders
Glue Fun Foam or plastic spiders on walls, the ceiling, windows, etc. Use cotton balls to represent a spider web and set plastic spiders on it.
OUTDOOR DECORATIONS
Witch clothesline
Purchase several pairs of striped socks or Halloween socks at your local dollar store. Hang them on an outdoor clothesline to create a unique garland. Let children manipulate the socks. They will enjoy moving them around (and therefore changing up your garland) each day.
Halloween trees
Glue plastic eyes, noses, and mouths on the bushes in your yard.
Giant scarecrow
Create a giant scarecrow with your group and set it next to your daycare entrance.
Scarecrow
Gather old clothing items (shirt, pants, shoes, hat) and stuff them with fabric or other clothing items. Use a pumpkin for a head. You can use clothing from your costume box. Sit your scarecrow on a chair, indoors or outdoors.
Haunted bottles
Line your walkway with empty soda bottles that you have filled with a mixture of water and food coloring. If you prefer, simply fill them with Halloween trinkets (erasers, plastic insects, etc.). Another option would be to fill them with sand and wrap them with Halloween-themed wrapping paper.
Monster eyes
Purchase several giant pairs of wiggly eyes (available on educatall online store). You could also buy ping-pong balls and simply draw monster eyes on them using black, yellow, and red permanent markers. Older children will love helping you. Next, use hot glue to stick both ends of a piece of Halloween ribbon behind each eye to create loops. Children can hang the monster eyes in a tree in your yard. Let children move them around as often as they wish.
CAT DECORATIONS
Mummy cats
For each child, you will need a piece of burlap, approximately the size of a piece of paper. (Open models-Halloween cat) Print the model and trace it on heavy cardboard. Cut it out to create a stencil. Help children place it on their piece of burlap (hold it in place with adhesive tape and press it down if needed so the paint remains inside the shape). Have them paint the shape black. When they are done, gently remove the stencil. Let dry. Once the paint is completely dry, provide several pieces of white electrical tape that children can glue on their cat to turn it into a mummy. Use orange, black, or purple string to hang the mummy cats in your daycare.
Cat plate
For this decoration, you will need paper plates, black poster paint, wiggly eyes, pipe cleaners, and black construction paper triangles. Let children paint their plate black. Once this is done, they can glue eyes, a nose, a m
outh, and ears on their cat… Of course, don’t forget whiskers!
Cat garland
(Open models-Halloween cat) Print and let children decorate the cats with glitter. Cut them out and hang them next to your daycare entrance or use them to create a garland.
PUMPKIN DECORATIONS
Emoji pumpkins
You will need several miniature pumpkins. With your group, paint them using yellow poster paint. Next, use a black permanent marker to draw eyes, a mouth, eyebrows, etc. to represent different popular emojis. You could also provide felt or Fun Foam hearts (for eyes) or circles (cheeks). Different shapes could also be cut out of felt to represent silly faces. Set your pumpkin emojis close to your daycare entrance so that everyone can admire them.
Three-dimensional pumpkins
You will need an orange pool noodle. Connect both ends to create a circle that will represent a pumpkin. Cut a peduncle out of green Fun Foam and glue it at the top of your pumpkin. Knot long pieces of green curling ribbon around the peduncle and curl them using scissors. Create several pumpkins using this method and hang them from the ceiling for the duration of the theme.
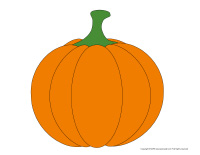
Popped pumpkins
(Open models-Pumpkins) Print or trace the pumpkin models on cardboard. Ask children to fill the pumpkin shapes with white glue and popped popcorn (or pumpkin seeds). You can buy cheddar-flavored popcorn for extra color. Display the pumpkins on a wall.
Three-dimensional pumpkins
Give each child a brown paper lunch bag. Have them fill it with recycled paper. Once this is done, twist the top and secure it with string to represent a peduncle. Children paint their pumpkin orange (or another color if they wish…why not!). Glue a Fun Foam leaf on the peduncle to complete the project. Hang these pumpkins from the ceiling.
Miniature pumpkins
Purchase several miniature pumpkins and let children decorate them as they wish. They can use glue, paint, glitter, feathers, etc. Simply set them in a Halloween basket to create a unique centerpiece.
Pumpkin man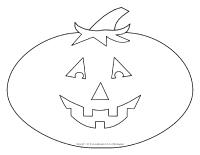
(Open pumpkin man) Print. Have children color and cut out the various parts. The large pumpkin will represent the head and body. Fold orange strips of construction paper accordion-style and glue them behind the pumpkin to represent arms and legs. Glue a medium-sized pumpkin to the end of each strip to represent hands and feet.
Mobile
Trace and cut pumpkins of different sizes. (Open model-Pumpkin) Decorate the pumpkins with glitter, lace, ribbon, cotton balls, etc. Glue them on either side of different lengths of string and hang them from the ceiling.
Magnetic pumpkin
You will need the top of a frozen juice can for each child. Cut a circle the same size as the top of the can out of orange felt. Glue it on the metal circle. Cut eyes, a nose, and a mouth out of black felt and have children glue them on the orange felt. Glue a magnet behind each tiny pumpkin so children can stick them on their refrigerator.
What’s inside?
Give each child a pumpkin model traced on orange construction paper. Using white glue, children must glue pieces of rope (to represent the pumpkin’s pulp) and pumpkin seeds on their model. Display the pumpkins on a wall once the glue is dry.
Pumpkin decorating contest
Organize a pumpkin decorating contest with the parents of your group. They only rule is that the pumpkins must not be carved (so they can be kept longer). Use the pumpkins to decorate your entrance or stairs leading to your daycare. Of course, each child can bring his or her pumpkin home in time for Halloween.
Pumpkin suncatchers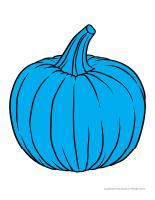
For each child, cut a pumpkin shape out of adhesive paper (Mac-Tac) and let them fill the shapes with fun Halloween items (metallic confetti, glitter, feathers, tissue paper, etc.). Set a second piece of adhesive paper over the first one and hang the pumpkin shapes in a window.
Pumpkin garland
(Open large colourful pumpkins) Print. Let children decorate the pumpkins. When they are done, cut them out and hang them within your daycare to form a garland.
BAT DECORATIONS
Flying bats
Give each child a paper plate and invite them to paint it yellow to represent a full moon. Let dry. (Open model-bat) Print and cut out the model. Have children trace it twice on black construction paper and cut out both shapes. Have them glue one bat outline on either side of their full moon. Use fishing wire to hang the bats from the ceiling.
Bats
(Open craft-bats) Print and trace the wings on heavy cardboard to create a model that children can trace on black construction paper. Have them cut out the construction paper wings and stick them on an empty toilet paper roll they have either painted black or wrapped in black paper. Use invisible thread to hang the bats from an indoor clothesline. Remember, the bats must be hung head down since they sleep during the day.
Garland-Bats
(Open models-Bats) Print and let children decorate the garland elements. Cut out the items and use them to create a garland that can be hung near your daycare entrance or within your daycare.
Hanging bats
Cut three (unattached) egg carton sections for each child. Cut one half-circle on either side to represent bat wings. Children paint their bat black. Make a hole in the center of each bat and thread a piece of invisible thread through it so you can hang the bats from the ceiling.
GHOST DECORATIONS
Hanging ghosts
Find a branch measuring approximately 30 cm for each child. You will need several balls of white yarn for this project. Help children cut several 30 cm pieces of yarn (no need to be precise). You can provide a 30 cm ruler to help them visualize how long the pieces should be. Each child will need at least thirty pieces of yarn. You can cut some ahead of time to help younger children. Have them knot one end of each piece of yarn around their branch, set horizontally in front of them. Tie one extremity of another piece of yarn to each end of their branch so it can be hung. The yarn pieces will hang vertically to represent a ghost. Invite children to gently press ghost eyes and a mouth cut out of black felt on the hanging pieces of yarn.
Ghost pillowcases
You will need a white pillowcase for each child. Cut ghost eyes and a mouth out of black felt for each child. Let them glue them on their pillowcase to make it look like a ghost. Help children slide their pillowcase over the back of their chair at the table.
My ghost
(Open model-Ghost) Print a ghost model for each child. Have them color it and cut it out. Glue a Popsicle stick behind each ghost and set them on a windowsill or along the edge of a shelf to create a special décor.
Ghosts at my feet
You will need black construction paper and white poster paint. Paint the bottom of children’s feet and press them on the paper to create adorable ghosts. Let dry. Children can add wiggly eyes or use a permanent marker to draw ghost eyes. Hang these ghosts in your cloakroom.
Ghost
You will need cheesecloth. Prepare a mixture of equal parts glue and water. Show children how they can press the cheesecloth in the mixture and then on an empty soda bottle. Let dry. Remove the bottle very gently and glue eyes on these unique ghosts.
Ghost mobile
Trace and cut out several ghost shapes (different sizes). (Open model-Ghost) Decorate them with glitter, lace, ribbon, cotton balls, etc. Hang them from the ceiling using different lengths of ribbon or string.
Sticky ghost
Cut a ghost shape out of adhesive paper and have children fill it with cotton balls or white tissue paper. Stick a piece of white ribbon or invisible thread behind each ghost so they can be hung within your daycare.
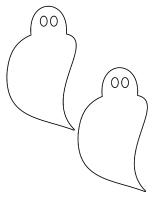
Ghost garland
(Open model-Ghost) Print several ghosts. Have children decorate them and cut them out. They can be used to create a garland that can be hung within your daycare or near your daycare entrance.
Tissue ghosts
Drape a tissue over a small Styrofoam ball and glue it in place. Add wiggly eyes and a string so your tiny ghosts can be hung from the ceiling. Make several, they are so cute!
SPIDER DECORATIONS
Mason jar spiders
Give each child a Mason jar and several plastic spiders. Have them glue the spiders all over their jar. Provide purple and orange glowsticks. Children can add them to their jar. Set the jars on the table to create adorable centerpieces.
A spider
Have children paint a Styrofoam ball black and insert pipe cleaners to represent spider legs.
They can glue wiggly eyes on their spider or paint them if they prefer. Hang the spiders from the ceiling using invisible thread.
My spider
(Open models-Spiders) Trace the model on black paper for each child. Have children cuti t out. Let them decorate their spider and help them “curl” the legs by wrapping them around a pencil.
Spider plate
For this craft, you will need paper plates, black paint, wiggly eyes, and pipe cleaners. Have children paint their plate black. Once the paint is dry, they can glue the eyes in place and use the pipe clean
ers to represent spider legs.
Bean spiders
(Open models-Spiders) Print the model for each child. Have them fill their spider shape with white glue. They can press dried black beans all over. If you wish, provide two dried kidney beans (red) to represent scary spider eyes.
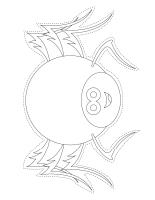
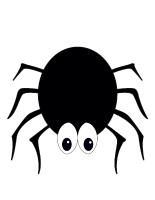
Spider garland
(Open models-Colored spiders) Print and let children decorate the spiders. When they are done, they can use them to create a garland that can be hung near your daycare entrance or within your daycare.
Spider mobile
(Open models-Spiders) Trace and cut out several spiders. Let children decorate them with glitter, paint, confetti, etc. Attach each spider to a piece of string and hang them to create a mobile.
COLORING PAGES
Coloring pages theme-Halloween-Decoration
(Open coloring pages theme-Halloween-Decorations) Print for each child.
Have fun!
The educatall team
 Home
Home Theme activities
 Babies and toddlers
 Arts and crafts
 Science
 Creative recipes
 Tips and tricks
 Extra activities
 Educ-TV
 Newsletter
  Online store
 Educatall club