CIRCLE TIME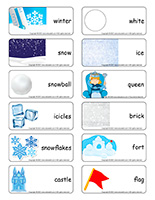
Let’s chat-Snow castles
During circle time, ask children if they have ever seen snow castles or snow forts. Use pictures and illustrations to support your discussion. (Open word flashcards-Snow castles) Print and laminate the word flashcards in the format you prefer. Use them to spark a discussion during circle time. Ask children questions related to the theme.
Circle time-Snow castles
At the start of each day, hide an item linked to your theme in a bin that you have filled with snow. Let children dig the item out, photograph it, and quickly print and display the picture on a special wall so that children can tell parents about their findings at the end of each day.
Wear white clothing items to welcome children in the morning. Name a “child of the day” and grant him privileges throughout the day.
Animated discussion-Snow castles
(Open picture game-Snow castles) Print and laminate the pictures in the format you prefer. Use them to spark a conversation with your group. Ask children questions about winter activities.
Clothesline-Snow castles
Encourage children to draw pictures of winter clothing items, snow castles, and snowflakes or cut these items out of magazines and catalogues. Next, have them hang their drawings or pictures on an indoor clothesline. Let children add to your clothesline garland throughout the theme.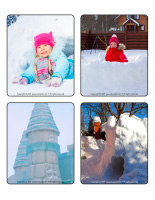
AREA SETUP
Thematic poster-Snow castles
(Open thematic poster-Snow castles) Print, laminate, and display where parents and children are sure to see it.
Stickers-Snow castles
(Open stickers-Snow castles) Print the illustrations on adhesive paper and use them to create unique stickers.
Educa-theme-Snow castles
(Open educa-theme-Snow castles) Print and laminate the different elements representing the theme. Use them to present the theme to your group (and their parents) while decorating your daycare.
Educa-decorate-Snow castles
(Open educa-decorate-Snow castles) Print, laminate, and cut out the illustrations. Use them to decorate your walls and set the mood for the theme.
Our giant snow castle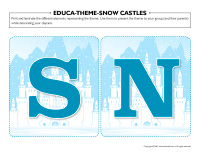
Remove the top of a very large cardboard box and paint the remaining sides using white poster paint. Let dry and lean the box up against a wall. Hang a large piece of light blue fabric on the wall, a few inches above the box. Drape the fabric over the box to represent the roof of your snow castle. Glue a long section of a silver dryer hose vertically in each corner of your snow castle. Wrap silver or light blue paper to form four cones that you can set on top of each dryer hose section to complete your snow castle’s towers. Arrange white cushions and blankets inside your snow castle. What a beautiful addition to your décor, one that children will love to explore throughout the theme.
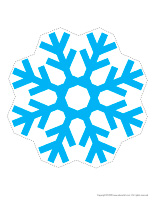
Tiny hanging snowflakes
Hang several plastic (or paper) snowflakes from your daycare ceiling. Display pictures of snowflakes on the walls.
My name in the snow
Write each child’s name in big letters on a piece of blue construction paper. Provide tiny white adhesive circles (used to repair torn loose-leaf paper) and invite children to press them on the letters that make up their name. The stickers will represent snowflakes. When they are done, hang each child’s name above his cubbyhole in the cloakroom or press them on the floor in your circle time area to indicate where they are to sit.
Tribute to snow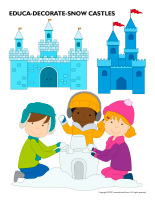
For the duration of the theme, use as many white accessories as possible. You could, for example, twist white paper garlands and hang them from the ceiling, from one end of your daycare to the other. Cut snowflakes out of blue Fun Foam and press them on the walls and hang a large Styrofoam ball wrapped in pieces of crumpled white or silver tissue paper from the ceiling.
My snow-covered floor
(Open models-Snowflakes) Print and have children color and/or cut out the snowflakes. Press them on the floor using adhesive paper. Use the snowflakes to delimit certain areas, to create a path that children can follow to move from one area to another, or simply to decorate your daycare throughout the theme.
Garland-Winter
(Open models-Winter) Print and let children decorate the models. Cut them out and hang them within your daycare to form a garland.
Winter-themed tree
In our “Back to school” theme, we suggested installing a tree trunk with branches in your daycare to accompany your various themes throughout the year. If you prefer, you can also paint a tree trunk and branches directly on a wall or large piece of paper. To decorate your tree for this theme, add white cotton balls to represent snow on the branches.
Create a winter thematic bin: white sheets, Styrofoam balls, winter illustrations, thematic books, boots, mittens, scarves, shovels, winter figurines, polar animals, fishing rod, white tissue paper, artificial snow, cotton balls, white paint, white modeling dough, sugar, flour, salt, rice, popcorn, etc.
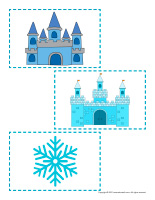
The pictures may be used as a memory game or to spark a conversation with the group. Use them to decorate the daycare or a specific thematic corner.
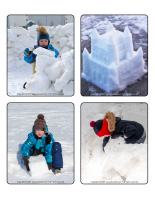
(Open picture game-Snow castles) Print, laminate, and store in a “Ziploc” bag or in your thematic bins.
Memory game-Snow castles
(Open picture game-Snow castles) Print the pictures twice and use them for a memory game.
ACTIVITY AND WRITING SHEETS
Activity sheets are provided for each theme. Print and follow instructions. (Open activity sheets-Snow castles)
Writing activities-S like snow
(Open writing activities-S like snow) Print for each child or laminate for use with a dry-erase marker.
Educa-spots-Snow castles
(Open educa-spots-Snow castles) Print for each child. Use bingo markers to add color to the different circles. If you don’t have bingo markers, children can add stickers or cereal inside the circles.
Tracing words-Snow castles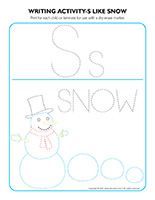
(Open word flashcards-Snow castles) (Open giant word flashcards-Snow castles) Print several word flashcards. Glue them on pieces of paper, laminate them, and arrange them in a binder. Show children how they can trace the words using dry-erase markers. If you wish, leave room under each word so children can try to write the words without tracing the letters.
Educa-nuudles-Snow castles
(Open educa-nuudles-Snow castles) Print for each child. Have children color the sheet and use Magic Nuudles to give it a three-dimensional look. Variation: You don’t have Magic Nuudles? Have children fill the spaces designed for Magic Nuudles with bingo markers or stickers.
To order Magic Nuudles:
http://www.educatout.com/catalog/index.php?cPath=76&osCsid=dfe8ad15c191a07bc61cf20f10cf6ca0
Stationery-Winter
(Open stationery-Winter) Print. Use the stationery to communicate with parents, in your writing area, or even to identify your thematic bins.
LANGUAGE ACTIVITIES
The flashcards may be used during circle time to spark a conversation with the group or in your reading and writing area. They may also be used to identify your thematic bins. (Open word flashcards-Snow castles) (Open giant word flashcards-Snow castles) winter, snow, snowball, icicles, snowflakes, castle, white, ice, queen, brick, fort, flag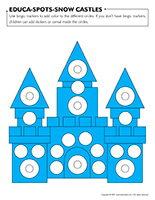
Let’s chat
(Open word flashcards-Snow castles) (Open giant word flashcards-Snow castles) Print and laminate the word flashcards. Have each child pick a flashcard and take turns presenting the item to the group. Discuss each item to see what children know about the theme.
Words in the snow
Stick the words from the theme’s word flashcards on Popsicle sticks and insert them in the snow in your yard. Invite children to stand on a line, at one end of your yard. When you give the signal, they must all run to pick one word and then use the tip of the stick to trace the letters in the snow. Help younger children if necessary. If you wish, you can also encourage children to use snow to represent the word or have them draw the item represented by the word on a snowy surface. The goal here is for children to have the opportunity to notice words. When they are done, simply brush the snow with a mitten-covered hand and repeat, making sure children find a new word to explore.
Scene-Snow castles
(Open scene-Snow castles) Print, laminate, and cut out the pieces. Let children use the items to decorate the scene.
Educa-chatterbox-Snow castles
(Open educa-chatterbox-Snow castles) Print and laminate the cards. To create your chatterbox, you will need an empty shoebox or a small bin that you can decorate as you see fit. Fill it with tiny objects, illustrations, pictures, and accessories related to your theme. To help you, we have created a series of cards that you may use. During circle time or, for example, when children are waiting for their lunch, have them take turns picking a card or object out of your chatterbox and naming the corresponding item.

Reinvented scrabble
(Open word flashcards-Snow castles) (Open giant word flashcards-Snow castles) Print many copies of the word flashcards and encourage children to use scrabble tiles to write the words. Manipulating the small tiles represents a great fine motor skill exercise. At the same time, children will notice which letters make up the different words.
Word association-Snow castles
(Open word flashcards-Snow castles) (Open giant word flashcards-Snow castles) Print two copies of several different word flashcards. On a large piece of cardboard, stick one copy of each flashcard vertically to create a word column. Cut the second copy of each word flashcard so you have the word on one side and the illustration on the other side. Attach Velcro behind each part as well as to the right of the uncut flashcards (on the cardboard). Arrange the cut flashcards on the table and encourage children to look at your flashcard board to identify a matching word and illustration. When they succeed, they may stick them next to the corresponding flashcard, on your board. This exercise will help children associate words with pictures.
Word tree-Snow castles
(Open word flashcards-Snow castles) (Open giant word flashcards-Snow castles) Print several word flashcards. Use a hole-punch to make a hole at the top of each flashcard. Thread a ribbon through each hole and tie a knot. Bring the word flashcards outside and encourage children to use them to decorate a tree. Every time a child adds a flashcard, invite him/her to “read” the corresponding word. Children will be happy to repeat this activity many times. Eventually, they will learn to recognize the words.
Word race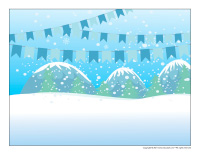
(Open word flashcards-Snow castles) (Open giant word flashcards-Snow castles) Print several word flashcards and hide them throughout your daycare or yard. Divide your group into two teams. When you give them the signal, children must search for the flashcards for a pre-determined period, for example three minutes. When the time is up, children must be able to “read” their flashcards to earn a point for their team. If they are unable to find the correct word, the other team can earn the point if they succeed.
Winter scene
(Open scene-Winter) Print, laminate, and cut out the pieces. Let children use the items to decorate the scene.
Sequential story-Winter
(Open sequential story-Snowman) Print and laminate the story. Cut out the illustrations and have children place them in the correct order.
ROUTINES AND TRANSITIONS
The waiting snow castle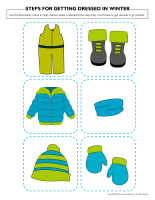
Cut an enormous basic castle shape out of blue paper. Laminate it and display it on a wall, in the hallway that leads to the bathroom for example. Set blue dry-erase markers as well as tiny Fun Foam or paper snowflakes with adhesive putty nearby. When children are waiting for their turn to go to the bathroom or brush their teeth, let them use the items to decorate the castle. They can draw windows, towers, snowflakes, icicles, etc. Using the adhesive putty, they can press snowflakes on the castle. At the end of the routine, simply remove the snowflakes and wash away their drawings so you can repeat the activity the next time children have to wait in line.
A treasure box
Since those who get dressed quickly often have to wait for their peers, prepare a treasure hunt. Simply fill a box with simple toys (cars, figurines, a small drawing board, small dolls, etc.). Children can explore the contents of the treasure box once they are fully dressed.
Illustrated steps for getting dressed in winter
(Open steps for getting dressed in winter) Print, laminate, and press Velcro behind each piece. Position the steps on the wall like stairs, with the first clothing item children should put on at the top and the last clothing item at the bottom.
How to use this illustrated routine
- To begin, present it to your group. Explain how the steps will help them know the order in which they must add clothing items when it’s time for outside play. Name each clothing item together.
- To foster learning, get dressed at the same time as your group. Add clothing items in the proper order and remove the corresponding illustration after each step is completed. Once children have acquired experience, you can permanently display the illustrations.
- Review each step with your group, asking them to add the corresponding clothing item.
- To evaluate children’s comprehension, you could ask children to explain each step.
- Even once children have mastered the art of getting dressed for winter outdoor play, continue to display the steps so that children can refer to them if necessary.
- Once a child can identify which step he is on, review all the previous steps, asking him if he put on his hat, his coat, etc.
Game-This is my spot-Winter
(Open my snowflake path) Print each illustration twice. Use adhesive paper to secure one copy of each illustration on the table. Deposit the second copy of each illustration in an opaque bag and invite children to pick a card that will determine their spot at the table (corresponding illustration). The illustrations can also be used to determine children’s naptime spots or their place in the task train.
My winter path
(Open my snowflake path) Print, laminate, and use adhesive paper to stick the illustrations on the floor, creating a path that leads to various areas frequently visited by the children in your group (bathroom, cloakroom, etc.). If you prefer, you can also use the illustrations to delimit workshops or corners within your daycare.
Calling your number
Cut snowflake or snowman shapes out of white construction paper and write a number on each one. You must have two snowflakes or two snowmen bearing each number. Glue one of each on your daycare chairs. At lunch time, invite children to come pick a number to determine where they shall sit.
Walking through the snow
Set several construction paper snowflakes on the floor of your daycare. Invite children to hop on them in a variety of different ways: on one foot, on two feet, like a frog, etc. This is great for building gross motor skills.
PHYSICAL ACTIVITY AND MOTOR SKILLS
Block castles
With the help of the children in your group, remove all white building blocks from your bins. Use them to build snow castles indoors. Use a white blanket to completely cover the floor in your construction area. Let children’s imagination guide them.
Cardboard snow castles
Collect several white empty cardboard rolls (toilet paper, paper towels, etc.), cone-shaped white paper drinking glasses, white cardboard boxes, cotton balls, Fun Foam snowflakes, etc. Encourage children to use the items to represent snow castles. Show children how they can set the tubes vertically on the floor and deposit a cone on top to add towers. Let their imagination be their guide.
Snow castle knights
For each child, you will need a blue swimming pool noodle. Bend one end and use silver string or ribbon to tie it to the remaining part of the noodle. The folded part of each noodle will become a horse’s head. (Open horse head) Print and cut out. Have children trace the contour of each piece on Fun Foam and cut them out. They can glue the ears, eyes, nostrils, and mane on their horse’s head. If they wish, they can cut tiny slits in their horse’s mane. Next, children hop on their horse and gallop around the daycare or yard. If you wish, use adhesive putty to press Fun Foam snowflakes on walls and toys. As they gallop around, children can collect the snowflakes and press them on their horse. This simple addition will encourage children to move.
Modeling dough activity placemats-Snow castles
(Open modeling dough activity placemats-Snow castles) Print and laminate. Let children pick a placemat and provide modeling dough. Encourage them to use the dough to fill or reproduce the shapes that are on their placemat.
Snowball lacing
Punch holes around the contour of a white paper plate for each child. Invite them to draw eyes, a nose, and a mouth on their snowball. Give children a long piece of silver yarn or ribbon and let them have fun threading it through the holes.
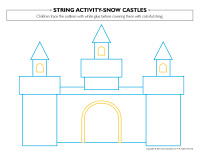
String activities-Snow castles
(Open string activities-Snow castles) Print for each child. Children trace the outlines with white glue before covering them with colourful string.
Pyramid-Snow bricks
(Open large stickers-Snow bricks) Print and use the stickers to create games. Collect empty tissue boxes. Decorate them using the stickers. Build a pyramid by stacking the boxes on a table. Children try to make the pyramid fall by tossing a frisbee towards it. Give each child 3 tries.
Snow sculptors
Divide your group into pairs. One child from each pair is the sculptor. His partner shall let him “sculpt” his body by placing his arms, legs, head, and core as he wishes. After a while, children exchange roles.
My three-dimensional castle
Prior to the activity, wrap cylindrical containers with heavy white paper. Add castle towers, windows, doors, etc. Using the containers, children build a snow castle. Store the material in a bin and set it in your construction area.
House of cards
Provide several decks of cards. Sit on the floor with your group and have fun using the cards to build castles.
Castle maze
Build a maze and add obstacles such as a rope hung between two chairs that children must crawl under (or jump over) without touching it. Incorporate items you have on hand. You can, for example, have children wear a crown to complete the course, encourage them to hop, spin around, walk backwards, etc. Use your imagination.
Homemade snow castle
Children will love to play in their very own snow castle. Drape old bed sheets over garden furniture, tables, chairs, etc. to create a basic structure. Add objects that are used to build snow castles such as trowels, shovels, buckets, etc. Encourage children to spend time inside their castle. They could even eat their snack there.
Frozen snow sculptures
Fill several empty milk cartons with water and set them outside or in a freezer until they are completely frozen. Remove the blocks of ice from the cartons and encourage children to pile them one on top of the other to create a variety of sculptures.
Snow constructions
Fill several yogurt and applesauce containers with water and add a few drops of food coloring to each one. Deposit them in the freezer or leave them outside until they are completely frozen. Empty the containers outside and use the colourful ice blocks for various constructions.
Winter pyramids
Use large disposable plastic drinking glasses. Decorate them using the theme’s stickers. Build a pyramid by stacking the glasses on a table. Children must make the pyramid crumble by tossing large white pompoms towards the pyramid.
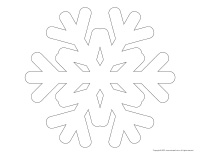
Fine motor skills-Crumpled snowflake shapes
(Open snowflake shapes) Print for each child. Have children tear pieces of tissue paper and crumple them to form balls. Next, children fill a snowflake shape with white glue and press the balls of paper all over. Display children’s artwork.
Snowflake hunt
(Open miniature snowflakes) Print and laminate. Hide the snowflakes throughout your daycare and invite children to search for them. The child who finds the most snowflakes can hide them for the next round.
Giant snowman
(Open giant snowman pieces) Print, laminate, and cut out each piece. Children sit on the floor and work together to assemble the pieces. The snowman can also be assembled on a wall and used to decorate your daycare.
Magnetic snowflakes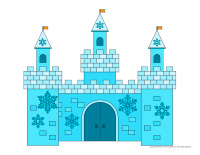
(Open models-small snowflakes) Print, color, and laminate the models before sticking them on magnetic paper. Leave the snowflakes on a table and provide a metal cookie sheet that children can stick them on.
Watch out for the snowman
Pick a child who will become a snowman. The snowman chases the other children until he touches one. The child who is touched becomes the snowman for the next round. Variation: You may also ask children who are touched to stop moving and hold their arms out to their sides. Children who are frozen can be saved if another child runs under their arms. Give everyone a turn to be the snowman.
Big snowman
Provide a large quantity of white blocks and help children stack them to represent a snowman. Keep going until your snowman falls.
Snow-filled surprise bins
Fill a small pool or several large containers with snow and hide various objects in the snow. When you give the signal, children search for the items. Have them deposit their findings in another container before going back to search for more. When all the objects have been found, hide them again and start all over.
Igloo
Provide several cardboard boxes (white if possible) children can use to build an igloo.
Snowflake with holes
(Open lacing-snowflake with holes) Print the snowflake on heavy paper and cut it out. Punch holes around the contour using a hole-punch. Have children thread ribbon or string through the holes.
It’s snowing
For this activity, you will need your parachute or a blanket. Children tear hundreds of tiny pieces of white paper (from your recycling bin) and set them on the parachute or blanket. Have each child hold on to the edge of the parachute or blanket. Encourage them to bounce the papers gently at first and when you give the signal, have them raise the parachute or blanket over their head to send the “snowflakes” flying. They will want to pick up the papers to repeat this activity. Variation: Use small Styrofoam balls instead of pieces of paper.
I am a snowflake
Children mime the following actions: tiny snowflakes gently falling to the ground, snowflakes blowing around in the wind, snowflakes being rolled into a ball, falling in the snow, jumping in snow, building a snowman, melting snow, etc. This activity can also be done during transitions.
Snowstorm
In the centre of the daycare, empty several bags of cotton balls on the floor. Let children have fun throwing cotton balls in the air, rolling around in them, lying down on top of them, etc. They may use them to build snowy streets too.
Ice fishing
(Open models-fish) Print and have children colour the fish. Next, cut them out. Attach string to the end of an old broomstick. Hang a clothespin at the end. Hide behind furniture and attach fish to the clothespin. Children fish one at a time. You may replace fish with toys or small surprises. Variation: Write points on the fish (for example a small fish could be worth 2 points and a large fish could be worth 5 points). Set up fishing teams. At the end of the game, calculate each team’s score to determine the winning team. This game may be played outdoors. Simply laminate the fish and hide behind a snowbank.
COGNITIVE ACTIVITIES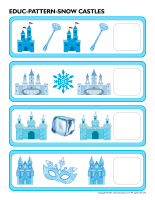
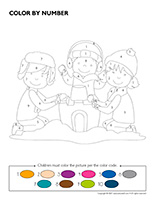
Color by number-Snow castles
(Open color by number-Snow castles) Print for each child. Have children color the picture per the color code.
http://www.educatall.com/members/GoTheme.aspx?pID=441
Educ-pattern-Snow castles
(Open educ-pattern-Snow castles) Print and laminate. Children use the cards to complete the patterns. Use Velcro or adhesive putty to stick the cards in the squares.
Puzzles
(Open puzzles-Snow castles) Print, laminate, and cut the puzzle pieces. Children must place the puzzle pieces correctly to recreate the scenes.
Educ-colors-Snow castles
(Open educ-colors-Snow castles) Print and laminate for durable, eco-friendly use or, if you prefer, print for each child. They must associate the items to the correct color and draw a line to connect them.
My cutting castle
(Open educa-cut-Castles) Print the various models. Children must cut the pieces and use them to reproduce the models.
Association game-My snow castle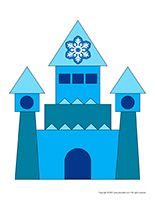
(Open association game-My snow castle) Print and cut out. Laminate the pieces for extra durability. Press Velcro behind each piece as well as on the models to create an association game. Give each child a castle. Arrange the shapes face down in front of your group. Children take turns picking a shape. Have them name the shape and color. Next, they must find which castle the shape goes with. The first child who completes his castle wins.
Big and small-Snow castles
(Open educ-big and small-Snow castles) Print and laminate the game. Children must place the cards from smallest to biggest and press them in the squares using Velcro or adhesive putty.
I am learning to count-Snow castles
(Open I am learning to count-Snow castles) Print and laminate the game. Children add the correct number of snow blocks using Velcro or adhesive putty.
Hunt and seek coloring-Snow castles
(Open hunt and seek coloring-Snow castles) Print and laminate. Children must find and color the items one by one.
Paper castles
(Open stencils-Snow castles) Print for each child. Have children tear tissue paper into small pieces and crumple them. Next, encourage them to fill a shape with white glue and press the tissue paper balls all over.
MORAL AND SOCIAL ACTIVITIES
Snow princes and princesses
For each child, you will need a piece of blue fabric. Lay each child’s fabric piece flat in front of them and invite them to glue Fun Foam snowflakes all over. Next, help them glue cotton balls along the edges of their fabric piece to represent fur. Let dry. Loosely knot the capes around their neck (supervision required) and invite them to enter an imaginary world where they are snow princes and snow princesses.
Snowball transfer game
For each child, you will need two small bowls, 10 cotton balls, and a clothespin. Each child deposits his 10 cotton balls in one bowl. When you give the signal, children must use their clothespin to grasp one cotton ball at a time and set it in their second bowl. The first child who has transferred all his cotton balls wins. To increase the level of difficulty, increase the distance between the bowls.
Igloo
Cover a table with white sheets. Deposit a bin filled with snow and winter figurines inside your “igloo”. Add books about polar animals. Children will love playing in their igloo.
ARTS & CRAFTS
Snow castle crowns
For each child, you will need several silver pipe cleaners. To begin, knot the extremities of 2 pipe cleaners together to create a simple crown for each child. Next, show children how they can wrap several cut pipe cleaner pieces (different lengths) around their crown, with them sticking up. Have them slide blue and silver necklace beads on each “pin”. Children will proudly wear their shiny crown.
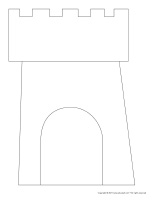
Models-Snow castles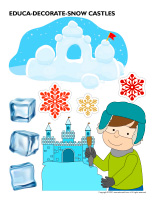
(Open models-Snow castles) Print the models and use them for various crafts and activities throughout the theme.
My hat
(Open educa-decorate-Snow castles) Print and cut out. Glue the items on a construction paper headband.
Mandalas-Snow castles
(Open mandalas-Snow castles) Print for each child. Encourage children to color the mandalas to help them enjoy a relaxing moment whenever needed during the day.
Giant snow globes
For each child, you will need a large clear plastic bag. (Open winter scene) Print the winter scene for each child and invite them to color it. Once this step is done, children can open their bag that is placed horizontally in front of them and glue the winter scene face up on the bottom part of the bag. Next, have them cut many small pieces of white tissue paper and add them to their bag to represent snow. If you wish, they can also add small Styrofoam balls, confetti, or glitter. Before sealing their bag, have them blow into it to fill it with air. Help them knot their bag and attach a pretty ribbon. Children will love shaking their snow globe to create a snowstorm.
Tiny snowmen
You will need round white makeup remover pads. Invite each child to take three pads and glue them one on top of the other on a piece of construction paper to represent a snowman. Next, they can draw or glue eyes, a nose, and a mouth. Provide tiny sticks they can use for arms. Encourage children to use recycled arts & crafts materials to add various accessories (hat, broom, buttons, scarf, etc.).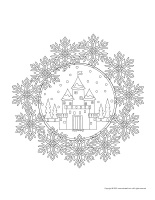
Cotton ball painting
On dark paper, let children paint using cotton balls. Show them how they can simply press the cotton balls in white poster paint and then on their paper.
Life-size snowman
Find three round objects of different sizes (garbage can lid, plate, bowl, etc.). Give each child a large piece of paper and have them trace the three items that you have found, helping them position the largest circle at the bottom, the medium-sized one in the center, and the smaller one on top. Let children decorate their snowman (hat, nose, mouth, broom, etc.).
COLORING PAGES
(Open coloring pages theme-Snow castles) Print for each child.
Have fun!
The educatall team
 Home
Home Theme activities
 Babies and toddlers
 Arts and crafts
 Science
 Creative recipes
 Tips and tricks
 Extra activities
 Educ-TV
 Newsletter
  Online store
 Educatall club