CIRCLE TIME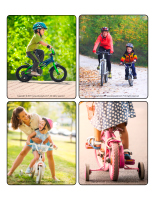
Animated discussion-Bicycles and tricycles
(Open picture game-Bicycles and tricycles) Print and laminate the pictures in the format you prefer. Use them to spark a conversation with your group. Ask children questions about the theme.
Illustrated circle time board
(Open picture game-Bicycles and tricycles) Print several pictures related to the theme and glue them on a large piece of colorful cardboard. Laminate your board. During circle time, use your board to present various items associated with your theme to your group. You can hand each child a dry-erase marker and have them circle the items as they identify them. This will help younger children understand what you are talking about.
AREA SETUP
Thematic poster-Bicycles and tricycles
(Open thematic poster-Bicycles and tricycles) Print, laminate, and display where children are sure to see it.
Educa-theme-Bicycles and tricycles
(Open educa-theme-Bicycles and tricycles) Print and laminate the different elements representing the theme. Use them to present the theme to your group (and children’s parents) while decorating your daycare.
Educa-decorate-Bicycles and tricycles
(Open educa-decorate-Bicycles and tricycles) Print, laminate, and cut out the illustrations. Use them to decorate your walls and set the mood for the theme.
Stickers-Bicycles and tricycles
(Open stickers-Bicycles and tricycles) Print the illustrations on adhesive paper and use them to create a collection of unique stickers. Use them to reward children throughout the theme.
Pedestrian crossing
To connect various areas and workshops within your daycare, use adhesive paper to draw a succession of wide white lines horizontally to represent a pedestrian crossing. Children will enjoy walking on the lines to move from one area to another.
Bicycle repair shop
Visit a bicycle repair shop with your group and ask the owner if he could lend (or give) you old bicycle tires. Attach colorful pieces of ribbon to the metal spokes and use a longer piece of ribbon to hang the tires from the ceiling in your daycare. Hang a series of black and white pennants on an indoor clothesline to represent a checkered flag.
PICTURE GAME
(Open picture game-Bicycles and tricycles) Use the pictures to decorate your daycare or to spark a conversation with your group. Print, laminate, and store the pictures in a Ziploc bag or in your thematic bin.
Memory game-Bicycles and tricycles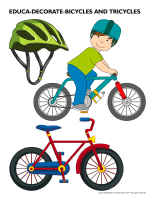
(Open picture game-Bicycles and tricycles) Print the pictures twice and use them for a memory game.
ACTIVITY SHEETS
(Open activity sheets-Bicycles and tricycles) Print and follow instructions.
String activities-Bicycles and tricycles
(Open string activities-Bicycles and tricycles) Print for each child. Children trace the outlines with white glue before covering them with colourful string.
Educa-spots-Bicycles and tricycles
(Open educa-spots-Bicycles and tricycles) Print for each child. Use bingo markers to add color to the different circles. If you don’t have bingo markers, children can set stickers or cereal inside the circles.
Writing activities-B like bicycle
(Open writing activities-B like bicycle) Print for each child or laminate for use with a dry-erase marker.
LANGUAGE ACTIVITIES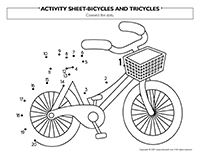
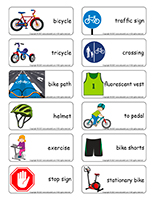
The flashcards may be used during circle time to spark a conversation with the group or in your reading and writing area. They may also be used to identify your thematic bins. (Open word flashcards-Bicycles and tricycles) (Open giant word flashcards-Bicycles and tricycles) bicycle, tricycle, bike path, helmet, exercise, stop sign, traffic sign, crossing, fluorescent vest, to pedal, bike shorts, stationary bike
Let’s chat
Print and laminate the theme’s word flashcards. Have each child pick a word. They can take turns presenting their word to the group (ex. bike shorts). Discuss each item and ask children questions to see what they know about the theme.
Scene-Pedestrian crosswalk
(Open scene-pedestrian crosswalk) Print, laminate, and cut out the items. Children use them to decorate the scene.
Point to (or name) the items
(Open word flashcards-Bicycles and tricycles) (Open giant word flashcards-Bicycles and tricycles) Print, laminate, and display the word flashcards on a wall in your circle time area or on a board that can be moved around. Children take turns identifying or naming an illustrated item related to the theme.
Tricycle driver’s license
(Open tricycle driver’s license) Print a tricycle driver’s license for each child. Invite children to draw themselves in the “Photo” section. If needed, help them write their name on their license. Laminate each child’s tricycle driver’s license. When children ride tricycles in your yard, invite one child to play the role of a police officer. He or she can stop children to check that their license and driving skills are in order. They will have fun asking the drivers questions in connection with bicycle and road safety, verifying that all traffic signs are respected, making sure their tires are properly inflated, that they aren’t driving too fast, etc.
ROUTINES AND TRANSITIONS
Let’s roll!
During waiting periods, encourage children to pretend they are pedaling a bicycle by moving their arms and legs in the air. You can, for example, invite them to pedal their arms forward and backwards. You can also have them lie down on the floor, raise their legs, and pedal their feet forward and backwards.
Bicycle storytime
Prior to storytime, laminate the pages of a storybook. Set the pages here and there throughout your yard, leaving a considerable distance between the illustrations that you have previously numbered. Invite children to pedal tricycles from one page to the next. Read each page before encouraging them to move on to the next one.
The cloakroom becomes a bike crossing
For the duration of the theme, transform your cloakroom to represent a bike crossing. Show children pictures to explain the importance of remaining on the correct side. (Open logos-bike path) Give each child a logo and invite them to personalize it. Glue a picture of each child on his or her logo and help them hang it above their hook in the cloakroom. Add traffic signs and use adhesive tape to draw a bike crossing on the floor. Glue a traffic light on a wall. Wear a crossing guard hat and vest to greet children.
All lined up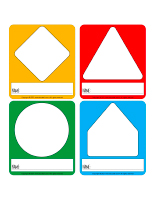
Glue a stop sign on a stick. Every time your group must move from one area to another, have a child hold the stop sign up, like a crossing guard. The other children must walk behind the crossing guard.
PHYSICAL ACTIVITY AND MOTOR SKILLS
Bicycle limbo
Hold a swimming pool noodle horizontally above ground and invite children to pedal tricycles under it. Lower the noodle periodically. Continue until children are no longer able to pedal under it, even if they bend forward as far as they can.
Colorful bicycles
(Open colorful bicycles) Here, you will need colorful pinnies like the ones sold on the educatall online store. Print, laminate, and cut out the small cards on which bicycles are illustrated. Laminate the large illustrations too and arrange them on the floor throughout your daycare. Children take turns picking a card. If, for example, a child picks a red bicycle, name the color and help him put the red pinnie on. Next, have him find the red bicycle on the floor. Once all the children in your group have found their bicycle, have them lie on the floor. Play music and have them pedal their legs in the air, matching the music’s rhythm. After a few seconds, have children take their pinnie off and pick a new card. This activity will foster color recognition while providing children with the opportunity to be active.
Bicycle hunt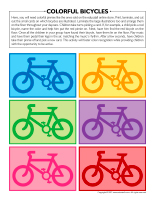
(Open miniature bicycles) Print and laminate. Hide the bicycles in your daycare and have children search for them. The child who finds the most bicycles can hide them for the next round.
Pyramid-Traffic lights
(Open stickers-traffic lights) Print and use the stickers to create games. Gather empty metal cans (different sizes). Decorate them with the stickers and stack them to form a pyramid. Children must try to make the pyramid fall by tossing a frisbee towards it. Give each child 3 tries.
Modeling dough activity placemats-Bicycles and tricycles
(Open modeling dough activity placemats-Bicycles and tricycles) Print and laminate. Let children pick a placemat and provide modeling dough. Encourage them to use the dough to fill or reproduce the shapes that are on their placemat.
Follow the peloton
Children hold hands. They must follow the rhythm of the first child in line and reproduce his or her actions (walk slowly, quickly, lightly, heavily, etc.).
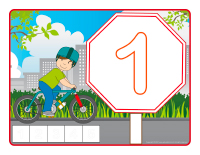
Fine motor skills-Models-Bicycles and tricycles
(Open models-Bicycles and tricycles) Print for each child. Have them tear and crumple pieces of tissue paper. They can use the tiny balls of paper to fill a shape. Display children’s artwork.
Tricycle tag
Select a child who will be the peloton leader. He chases the other children until he touches one of his peers. The child who is touched then becomes the peloton leader.
Lacing-Bicycles and tricycles
(Open lacing-Bicycles and tricycles) Print, laminate, and cut out the shapes. Punch holes around the contour of each one. Children can thread a string, a shoelace, or ribbon through the holes.
Traffic lights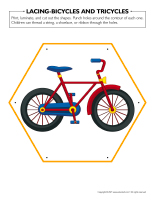
Ask children to form a line at one end of your playing area. Use red, green, and yellow circles to represent traffic lights and indicate how children are to move towards you. When you show the red light, they must stop in their tracks. When you show the green light, they may run towards you, but if you show the yellow light, they must walk instead of run. The first child who reaches you becomes the leader for the next round.
Cyclist course
Have children stand in a line. Walk around the daycare, imagining things you may see if you were riding a bike around the neighborhood: a stop sign, a traffic light, a pedestrian, a school bus, a traffic sign, another cyclist, etc.
Red light, yellow light, green light…
(Open traffic lights and signs) With your group, draw a giant village on a paved area in your yard using sidewalk chalk. Depending on the size of the area, include roads, a grocery store, a bank, a playground, a daycare, a school, etc. Add traffic signs. Children will have fun riding around your village on tricycles or in push cars. Use red, green, and yellow circles to represent traffic lights. When the green light is shown, children can drive around your village as fast as they wish. However, when the yellow light is displayed, they must slow down. When you hold the red light up, they must stop where they are. If a child moves while the red light is displayed, blow a whistle and hand him a speeding ticket. You can, for example, have him sing a song to “pay his fine”.
Intersection construction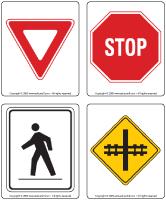
Using building blocks, represent streets, intersections, and pedestrian crosswalks with your group. To begin, have them arrange blocks on the floor, forming 2 parallel lines that will become streets. Help them create street corners. At each corner, children can use white or yellow blocks to connect both sides and represent a pedestrian crosswalk. (Open small stop signs) Print this miniature traffic sign for each child. They can color it and glue it to one end of a toothpick. Using clear adhesive tape or putty, they can press it on a figurine. Children will love playing with their miniature crossing guard in their building block streets. Add other figurines that they can help cross the street at different intersections.
COGNITIVE ACTIVITIES
One bike, two bikes, three bikes…
(Open bicycle counting) Print and laminate for each child. Give each child a dry-erase marker. They take turns rolling a die and, per the number shown on the die, they circle a certain number of bicycles. For example, if a child rolls a “3”, he can draw a circle around 3 bicycles. The first child who circles all the bicycles on his sheet wins.
Bike helmet designers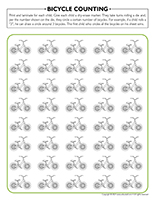
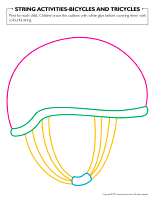
(Open bike helmets) Print a bike helmet as well as the page with shapes printed on it for each child. Have children cut out the shapes. Have them color their helmet using the color of their choice. Print, laminate, and cut out the cards. Each child picks a card, finds the shapes illustrated on it, and uses them to decorate his or her helmet. Children can glue the shapes on the helmet or simply deposit them on it. Verify their work.
Counting cards-Bicycles and tricycles
(Open counting cards-Bicycles and tricycles) Print and laminate. Prepare a series of wooden clothespins on which you can paint or draw numbers 1 to 9. Children count the items on each card and place the corresponding clothespin on the correct number.
Color by number-Bicycles and tricycles
(Open color by number-Bicycles and tricycles) Print for each child. Have children color the picture per the color code.
Hunt and seek-Bicycles and tricycles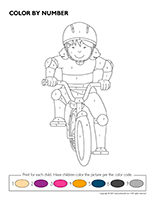
(Open hunt and seek-Bicycles and tricycles) Print and laminate. Children pick a card and search for the illustrated item in the scene.
Puzzles-Bicycles and tricycles
(Open puzzles-Bicycles and tricycles) Print, laminate, and cut out. Children must place the pieces to complete the scenes.
Game-Four bicycles
(Open game-Four bicycles) Print, glue the cards on opaque cardboard, and cut them out. Arrange all the cards upside down on the floor or table (so you can’t see the illustrations). Children take turns rolling a die. Every time a child rolls a “1”, he can turn a card. If he doesn’t already have this bicycle in front of him, he keeps the card and places it in front of him for everyone to see. The first child who has collected all four bicycles wins.
MORAL AND SOCIAL ACTIVITIES
Collective bicycle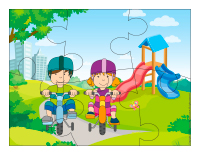
Ask around to see if someone you know has an old bicycle they haven’t used in a long time. Set it in a corner of your yard. With your group, paint the bicycle. Have fun adding glitter to the paint. Let dry. Next, press adhesive Fun Foam shapes on the spokes. Hang a pretty basket on the handlebars and fill it with plastic flowers. Attach colorful pieces of ribbon to each handle. Wrap the seat with pretty fabric. Let children follow their imagination.
Searching for bike path lights
If possible, visit various intersections where a bike path is present to show children the correct way to use bike path lights and encourage them to practice counting backwards, naming the displayed numbers. Help children understand how many seconds they require to cross the street, with or without their bicycle or tricycle.
Crossing guard treasure hunt
(Open crossing guard treasure hunt) Print and laminate. Set the printed list of items to search for on a clipboard that you can take on your daily walk. Every time a child sees a stop sign, a pedestrian light, a sign indicating a pedestrian crosswalk, or a traffic light, he can use a dry-erase marker to draw a checkmark or an “X” next to the corresponding illustration. When you get back to your daycare, count how many signs and lights of each kind you saw. The next day, select a different route and repeat the exercise.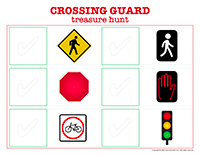
Pedestrian lights
Instead of using traffic lights to encourage children to run, walk, or remain still, use pedestrian lights. (Open pedestrian lights) Print and glue each light on a piece of cardboard. Present them to your group and explain how when the white silhouette is displayed, they may walk (not run!) to cross the street. When they see the flashing orange hand, they must walk somewhat faster to get to the other side of the street as quickly as possible, but safely and without running. Finally, when the non-flashing orange hand is shown, they mustn’t cross. Invite children to stand on a line at one end of your yard or daycare. Stand at the opposite end of your “street”, holding the lights. Display the white silhouette. Children start walking towards you. Next, show the flashing orange hand. Children must walk faster. As soon as they see the non-flashing light, they must stop walking and remain perfectly still. Of course, make sure children understand this is a game and that, in reality, the non-flashing light means they should not cross the street.
CULINARY ACTIVITIES
Red, yellow, and green Jell-O
Prepare a dessert using red, yellow, and green Jell-O. Let children manipulate the Jell-O powder and add water. Pour the preparation in Styrofoam glasses and place them in the refrigerator to set. Children can tear the Styrofoam off the Jell-O and use the red, yellow, and green circles to represent a traffic light.
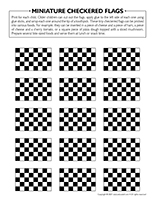
Tiny checkered flags
(Open miniature checkered flags) Print for each child. Older children can cut out the flags, apply glue to the left side of each one using glue sticks, and wrap them around the tip of a toothpick. These tiny checkered flags can be pricked into various foods. For example, they can be inserted in a piece of cheese and a piece of ham, a piece of cheese and a cherry tomato, or a square piece of pizza dough topped with a sliced mushroom. Prepare several bite-sized foods and serve them at lunch or snack time.
Traffic light sandwiches
For each child, cut a slice of crustless whole wheat bread in half vertically. Let children spread cream cheese or tofu spread on one half. In the other half, use a small round cookie cutter to cut three circles out of the soft bread, one on top of the other. Children set the half with circles cut out of it over the first half. Next, provide cut cherry tomatoes, corn kernels, and shredded iceberg lettuce. Children press tomatoes in the top circle, corn kernels in the middle circle, and lettuce in the bottom circle to represent traffic lights.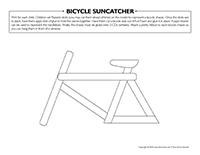
OUTDOOR ACTIVITIES
Bike accessories
Fill a bag with pipe cleaners, pieces of colorful ribbon (approx. length 15 cm), drinking straws that you have cut lengthwise, etc. Show children how they can use the material to decorate the spokes and handlebars of your bicycles and tricycles. The pipe cleaners can be wrapped around the spokes, the ribbon pieces can be knotted around the handlebars, and the drinking straws can be slid directly on the spokes.
Rolling paint
For this activity, if it isn’t warm enough for children to wear shorts, ask parents to send old pants. Roll a very long piece of white paper out on an asphalted surface in your yard. Invite children to paint the tires of an old tricycle. Next, have a child pedal the tricycle down the paper banner. Wash the tires and repeat using a different color. Continue until the banner is nearly filled with color. Let dry and display your unique artwork.
ARTS & CRAFTS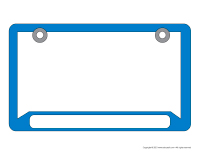
Bicycle suncatcher
(Open bicycle suncatcher) Print for each child. Children set Popsicle sticks (you may cut them ahead of time) on the model to represent a bicycle chassis. Once the sticks are in place, have them apply dots of glue to hold the pieces together. Have them cut a bicycle seat out of Fun Foam and glue it in place. A pipe cleaner can be used to represent the handlebars. Finally, the chassis must be glued onto 2 CDs (wheels). Attach a pretty ribbon to each bicycle chassis so you can hang them in front of a window.
My bicvcle license plate
(Open bicycle license plate) Print for each child. Help children write their name on the line using a permanent marker or Fun Foam letters. At the bottom of each license plate, write the name of your group or daycare. Provide stickers and tiny Fun Foam shapes that children can use to personalize their license plate. When they are satisfied, use a hole-punch to make two holes at the top of each license plate. Children can insert pipe cleaners and use them to attach their license plate to their bicycle or tricycle handlebars.
Crossing guard stop sign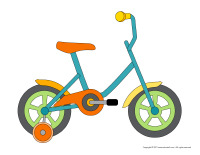
(Open crossing guard stop sign) Print for each child. Have them color, cut out, and glue their sign on heavy cardboard before gluing a wooden stick behind it so they can use it to pretend they are crossing guards.
Models-Bicycles and tricycles
(Open models-Bicycles and tricycles) Print the models and use them for various activities and projects throughout the theme.
COLORING PAGES
Coloring pages-Bicycles and tricycles
(Open coloring pages theme-Bicycles and tricycles) Print for each child.
Have fun!
The educatall team
 Home
Home Theme activities
 Babies and toddlers
 Arts and crafts
 Science
 Creative recipes
 Tips and tricks
 Special needs
 Extra activities
 Educ-TV
 Newsletter
  Online store
 Educatall club


