CIRCLE TIME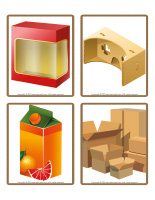
Animated discussion
(Open picture game-Cardboard) Print and laminate the pictures in the format you prefer. Use them to spark a conversation with your group. Ask children questions pertaining to the theme.
Point to (or name) the pictures
(Open word flashcards-Cardboard) (Open giant word flashcards-Cardboard) Print, laminate, and display the word flashcards on a wall next to your circle time area or on a piece of cardboard that can easily be moved around. Name a word and encourage children to take turns pointing to the correct word flashcard.
Poni discovers and presents-Cardboard
(Open Poni discovers and presents-Cardboard) Print the various cards. Laminate them and cut them out. Use your Poni puppet (or another puppet children are familiar with) to present the different pictures to your group.
Flipogram-Cardboard
(Open picture game-Cardboard) Print and laminate the pictures in the format you prefer. Use a hole-punch to make a hole in the upper right and left corner of each picture. Stack the pictures and insert a ring through each set of holes. The flipogram is easy to manipulate. Simply show children how they can lift a picture and flip it under the stack. Name each item with your group. Use the flipogram to encourage children to talk during circle time and to ask them questions about the theme. You can, for example, ask them to name things that are made of cardboard, to find cardboard items in your daycare, or ask them if they know how cardboard is made.
A cardboard train
With your group, paint several boxes and decorate them to make them look like train cars. Transform one box to represent a locomotive. Line the boxes up one behind the other on the floor. You can connect them with rope. Use this original train during circle time, when children need to calm down, or for various games.
Cardboard circle time spots
In your circle time area, set a cardboard box upside down on the floor for each child. They will enjoy sitting on the boxes during discussion periods. If children normally sit on small cushions, set them on the boxes. If you wish, invite children to decorate the box they are to sit on throughout the theme.
AREA SETUP
Thematic poster-Cardboard
(Open thematic poster-Cardboard) Print, laminate, and display where children and parents are sure to see it.
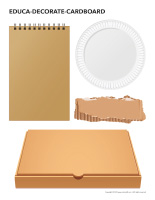
Educa-decorate-Cardboard
(Open educa-decorate-Cardboard) Print, laminate, and cut out the illustrations. Use them to decorate your walls and set the mood for the theme.
Stickers-Cardboard
(Open stickers-Cardboard) Print the illustrations on adhesive paper and use them to create a collection of unique stickers. Use them to reward children throughout the theme.
Educa-theme-Cardbaord
(Open educa-theme-Cardboard) Print and laminate the different elements representing the theme. Use them to present the theme to your group (and children’s parents) while decorating your daycare.
Garland-Cardboard
Cut scraps of different types of cardboard. Try to find cardboard that offers a variety of textures. Use them to create a garland that can be hung within your daycare or near your daycare entrance.
Cardboard everywhere
Hang a clothesline in your daycare, approximately 2 meters from the floor. Hang a sheet or blanket on it to create a wall that you can pin drawings children have created on pieces of cardboard. Set cardboard boxes inside a tent or in a special corner. Let children explore them.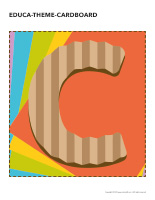
Cardboard box
To present your theme, set a large box filled with several boxes (different sizes and shapes) in one corner of your daycare. If possible, add boxes with different textures and in a wide range of colors. Let children manipulate the boxes and play with them as they see fit.
Paper and cardboard dishes
Throughout the theme, use only paper and cardboard plates, drinking glasses, bowls, etc.
Unique toy chests
Gather several cardboard boxes. Paint them using bold colors to cereate unique toy chests. With your group, determine which type of toys each box shall contain. Cut pictures representing the toys out of catalogues (or use the pictures from the actual toy packages) and glue them on the boxes. Once your toy chests are ready, line them up on shelves or against a wall and encourage children to practice sorting your daycare toys.
Square cubbyholes
You will need a square box for each child in your group. Provide different colors of poster paint and invite children to pick a color that they can use to paint their box. Once the paint is dry, stack and line up the boxes to create a large cube. For example, for 9 children, stack 3 rows of 3 boxes. Children will love using their homemade cubbyholes to store their personal belongings, their artwork, etc.
PICTURE GAME-CARDBOARD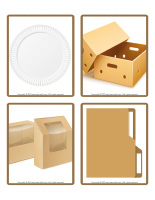
Picture game
The pictures may be used as a memory game or to spark a conversation with the group. Use them to decorate the daycare or a specific thematic corner. (Open picture game-Cardboard) Print, laminate, and store in a “Ziploc” bag or in your thematic bins.
Memory game-Cardboard
(Open picture game-Cardboard) Print two copies and use the cards for a memory game.
ACTIVITY SHEETS
Activity sheets are provided for each theme. Print and follow instructions. (Open activity sheets-Cardboard)
A different way of using activity sheets
Stick two crayons end to end. Encourage children to use one end to complete part of an activity sheet before rotating it and inching their fingers towards the other end to complete it using the second color.
Different working positions
Stick activity sheets on walls, on the floor, under tables, etc. Invite children to stand up, sit, or lie down to complete them.
WRITING ACTIVITIES
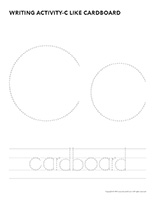
Writing activity-C like Cardboard
(Open writing activities-C like Cardboard) Print for each child or laminate for use with a dry-erase marker.
String activities-Cardboard
(Open string activities-Cardboard) Print for each child. Children trace the lines with white glue and then press colorful string or yarn in the glue.
Educa-nuudles-Cardboard
(Open educa-nuudles-Cardboard) Print for each child. Have children color the sheet. Once they are done, they may use Magic Nuudles to turn the coloring pages into three-dimensional works of art.
Variation: If you do not have Magic Nuudles, ask children to fill the spaces designed for Magic Nuudles with bingo markers or stickers.

Creating your own activity binder
Laminate several activity sheets and writing activities and arrange them in a binder along with dry-erase markers. Leave the binder in your writing area and let children complete the pages as they wish. At the end of the day, simply wipe off their work so the activity binder can be reused.
LANGUAGE ACTIVITIES
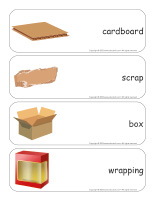
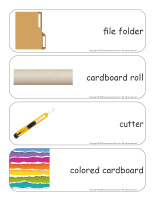
The flashcards may be used during circle time to spark a conversation with the group or in your reading and writing area. They may also be used to identify your thematic bins. (Open word flashcards-Cardboard) (Open giant word flashcards-Cardboard) cardboard, scrap, box, wrapping, case, craft, egg carton, plate, file folder, cardboard roll, cutter, colored cardboard
Let’s chat
Print and laminate the theme’s word flashcards. Have each child pick a word. They can take turns presenting their word to the group (ex. cutter). Discuss each item and ask children questions to see what they know about the theme.
Reinvented scrabble
(Open word flashcards-Cardboard) (Open giant word flashcards-Cardboard) Print many copies of the word flashcards and encourage children to use scrabble tiles to write the words. Manipulating the small tiles represents a great fine motor skill exercise. At the same time, children will notice which letters make up the different words.
Words on a wire
(Open word flashcards-Cardboard) (Open giant word flashcards-Cardboard) Print two copies of several word flashcards. Hang one copy of each flashcard on a clothesline using colourful clothespins. Arrange the other word flashcards in a pile. Let children take turns picking a word flashcard. Help them read their word before inviting them to find the corresponding word flashcard on the clothesline. When they find it, they can place the word flashcard they picked over the word flashcard on the clothesline using the same clothespin. Help younger children manipulate the clothespin if necessary.
Word race
(Open word flashcards-Cardboard) (Open giant word flashcards-Cardboard) Print several word flashcards and hide them throughout your daycare or yard. Divide your group into two teams. When you give them the signal, children must search for the flashcards for a pre-determined period, for example three minutes. When the time is up, children must be able to “read” their flashcards to earn a point for their team. If they are unable to find the correct word, the other team can earn the point if they succeed.
Associating words and pictures
(Open giant word flashcards-Cardboard) (Open word flashcards-Cardboard) Print, laminate, and display the word flashcards on a wall or a large piece of cardboard that can be moved around. Name a word and have children identify the corresponding word flashcard.
Writing boxes
For this activity, you will need several boxes that are all the same size (35-40 boxes total). Wrap them in white paper and use bold-colored markers to write the letters of the alphabet on the boxes. You will need several blocks containing letters that are frequently used, such as vowels. On index cards, write several simple words, including the name of each child in your group. Have children pick a card and arrange the blocks displaying the corresponding letters in order to reproduce the words.
ROUTINES AND TRANSITIONS
My cardboard path
Cut shapes out of cardboard and set them on the floor, creating a path connecting different areas within your daycare. The path may lead to frequently visited areas such as the bathroom and the cloakroom, or simply delimit various workshops and corners.
It’s my spot
Use adhesive tape to secure pieces of different types of cardboard on the table. Set a second piece of each cardboard type in a bag. Children take turns picking a piece of cardboard out of the bag to determine their spot at the table for the day. You may also use the pieces of cardboard to determine naptime spots or to distribute tasks.
PHYSICAL ACTIVITY AND MOTOR SKILLS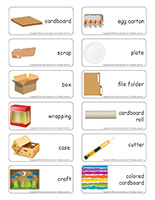
Cardboard floor
Pre-cut several squares of colorful cardboard that are the same size as your floor tiles (you must have enough to cover a fairly large surface). Ask children to use the cardboard squares to cover your floor tiles. The only rule that must be respected is that each square must touch another, at the very least corner to corner. Use adhesive tape to secure the squares in place. The colorful floor created by the children in your group can be used for a game of musical squares or to create an interactive story (the blue squares can represent water that children must hop over, the orange squares can represent fire, etc.).
Shapes
Cut shapes such as triangles and squares out of various types of cardboard or Fun Foam sheets. Let children use them to create mosaics. You may choose to provide larger shapes that they can use to create giant mosaics on the floor.
Cardboard and building blocks
Provide all kinds of building blocks in your construction area and encourage children to use them along with pieces of different types of cardboard for colorful three-dimensional projects.
Cardboard race
Set several cardboard shapes on the floor. When you give them the signal, children will have 2 minutes to collect objects of a certain color, determined by the leader of the game. They must set them on a shape of the corresponding color.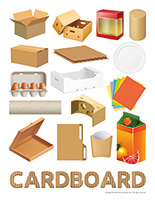
Associating cardboard pieces and colors
Provide gift bags in a variety of colors. Hide tiny pieces of different types of cardboard throughout your daycare. Hand each child a bag of a different color and encourage them to collect pieces of cardboard that are the same color as their bag. To increase the level of difficulty, you can use bags containing more than one color.
Cardboard pyramid
(Open stickers-Cardboard) Print and use the stickers to create games. Collect empty cardboard boxes (cracker and cereal boxes for example). Decorate them with the stickers and stack them to form a pyramid. Invite children to try to make the pyramid fall with a frisbee. Give each child 3 tries.
Inexpensive building blocks
Collect several cardboard boxes (different sizes). Seal the boxes and invite children to paint the boxes with bold-colored poster paint. Once the paint is dry, children can press stickers on the boxes, just for fun. These boxes can be used as building blocks. Children will love to stack them or use them to create a variety of structures, characters, and objects.
Obstacle race
Use several cardboard boxes to create an obstacle course. You can wrap boxes with fabric or wrapping paper to add a pop of color. Children can move from one box to the next and perform various actions or challenges at each one. They could, for example, have to jump over a box, transport a heavy box, step in a few boxes arranged in a line, pull a box that you have attached a long rope to, etc.
Original toolboxes
Ask children to help you paint a few rectangular boxes with red poster paint. Attach both ends of a heavy rope to either end of the box to create handles. Fill your toolboxes with plastic tools. Children will enjoy transporting tools outside to “fix” items in your yard.
Where is the cardboard?
Hide a precise number of cardboard pieces throughout your yard. Set a basket on the ground. Children must set all the pieces of cardboard they find in the basket. They must run to the basket every time they find a cardboard piece and therefore collect only one piece at a time.
Cardboard and shapes
Cut basic shapes out of flattened cardboard boxes. Invite children to paint them. They can later use them to create scenes. They can, among other things, set a triangle on top of a square to represent a house. You can have them glue the shapes on a large piece of cardboard or simply encourage them to set the shapes on the floor or a table so they can be used over and over again.
Cereal box puzzles
Cut popular cereal brand boxes, keeping only the front of each box. Cut the front of each box into pieces. The number of pieces will depend on the ages of the children in your group. Invite children to reconstruct the images.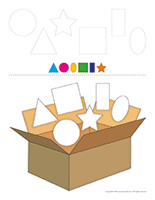
I am looking for cardboard
Identify all the cardboard items that are present in your daycare: board game boxes, crayon boxes, storage boxes, snack boxes, toy packaging, etc.
Original boxes
Cut several cardboard boxes (cereal, cracker, cookie, pasta, etc.) into several small squares and set them in a manipulation bin. Have fun challenging children to, for example, find a piece that has red on it.
Cardboard stamps
Cut basic shapes (circle, square, triangle, oval, rectangle) out of heavy cardboard. Using hot glue, stick a cork in the center of each shape. Children will love pressing these homemade stamps in paint and then on paper to make impressions. You can create several stamps for each shape so that children can, for example, press one triangle in red paint, another triangle in blue paint, and so on.
Cardboard obstacle course
Arrange several boxes of the same size on the floor. For example, you could create a large square by arranging 3 rows of 3 boxes each together. Select one corner of your square that will be your starting point. Write the word “start” on the corresponding box. Set a bingo marker inside 3 of the 9 boxes. When you give the signal, a child must climb into each box, one after the other to reach the final box that you have identified as “end”, collecting all 3 bingo markers that are hidden in the boxes along the way.
My private drawing surface
You will need a large cardboard box for each child. Cut a small door in one side of each box. Show children which box is theirs. You can identify each box by writing a child’s name on it. Set 4-6 markers inside each box. Whenever they feel like it, children can go to their box and use the markers to decorate the inside of their box. At the end of the theme, children can invite their peers to visit their masterpiece.
Cardboard box sorting
Collect several different sizes of cardboard boxes. Invite children to arrange them in order, from the smallest to the biggest.
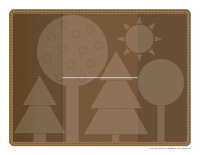
Cardboard scene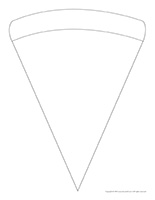
(Open cardboard scene) Print the model for each child. Provide cardboard from cut cereal boxes and encourage children to cut the shapes they see in the scene out of the cardboard, respecting the size of each shape as much as possible. You can cut the shapes out for younger children ahead of time. Next, have them glue the shapes on the model or on a piece of construction paper (non-printed side upwards) to reproduce the scene.
Tidy shapes
(Open tidy shapes) Print for each child and invite them to cut the page in half, along the dotted line. Have them color the shapes per the color code. Next, children must cut the shapes in the upper portion of the activity sheet and find a way to glue them all in the cardboard box. Encourage them to set the shapes in the box before gluing them in place to ensure they all fit.
Cardboard pizza
(Open cardboard pizza) Print for each child. Invite children to glue their pizza slice on cardboard using a glue stick before cutting it out. Use cardboard that is not too thick to make this task easier for little hands. Let children decorate their pizza slice with red felt circles to represent pepperoni, small green Fun Foam rectangles to represent peppers, etc. Children can also simply draw mushrooms, sausage pieces, vegetables, etc. on their slice. What’s more, they can glue pieces of brown cardboard or tissue paper at the top of their pizza slice for the crust. When they are done, glue all the pizza slices in a clean pizza box (ask your local pizzeria for one) to represent a 6-piece pizza. Help children notice that pizza is delivered in a cardboard box.
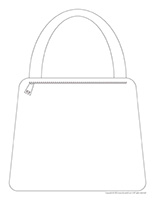
Cardboard bag
(Open my cardboard bag) Print twice for each child. Children must glue either side of their bag on cardboard that is not too thick (so that cutting is possible) using a glue stick. Let them decorate their bag using markers, stickers, Fun Foam shapes, etc. When they are done, they must cut out both sides of their bag. Help them attach a plastic bag (cut the handles if necessary) between both cardboard sides using staples. Children will enjoy using their cardboard bag to transport things.
Targets
Once again, paint several paper plates with the children in your group. Once the paint is dry, the plates will become targets that children can aim for with bean bags or small foam balls. You can make this activity more or less difficult by setting the targets on the floor, closer or farther away, or by hanging them on a wall at different levels. If you wish, write a number on each plate to represent the number of points children can earn when the hit the various targets.
MUSICAL AND RHYTHMIC ACTIVITIES
Musical cardboard
(Open picture game-Cardboard) Print and laminate the pictures. Press them on the floor in your daycare. To the sound of music, children walk around the daycare. When the music stops, they must quickly find a picture to stand on. Variation: If you wish, you can remove a picture after each round. Children will have to share the pictures.
Rhythmic cardboard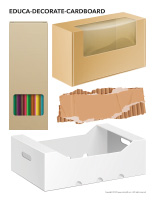
In your yard, set several pieces of colorful cardboard on the ground. Using a drum, determine different rhythms with your group. Associate each rhythm to a color. For example, when you tap the drum twice very lightly, you can decide that they must find a blue square to stand on and when you tap the drum once loudly, they must find a pink square.
Cardboard village
Collect several small cardboard boxes. Invite children to help you transform them to make them look like little houses for figurines. Provide bold-colored markers, Fun Foam shapes, etc. Create houses, stores, a school, a garage, a castle, etc. Keep going until you have a complete cardboard village that children can play in with figurines. Be sure to keep a few extra boxes nearby so that children can add any missing buildings to their village as they invent different scenarios.
A movement die
Seal a cardboard box with strong adhesive tape. Use adhesive paper to press a picture representing a specific action (jumping, clapping, touching your feet, etc.) on each side of the box. Use it as a die. Children can roll the die to determine which action they are to perform.
Tunnel exploration
Cut the bottom and the top off of several cardboard boxes and position them one behind the other on the floor. If you wish, use colorful masking tape to stick the boxes together. Invite children to crawl through the tunnel you have created. You can even bring your tunnel outisde!
OUTDOOR ACTIVITIES
One point, two points, three points
Set several different boxes (various sizes) here and there in your yard. Encourage children to try to toss colorful bean bags or frisbees in the boxes. You can attribute a certain number of points to each box. For example, a small box may be associated with a greater number of points whereas a bean bag or frisbee landing in a larger box can yield fewer points, since succeeding should be easier.
Soccer goals
You will need two very large boxes (such as appliance boxes) that are the same size. Position them on their side, with the opening of each box pointing towards the center of your playing area, at opposite ends. The boxes will represent soccer goals. Organize a game of soccer by dividing your group into 2 teams. If you wish, use a colorful beach ball instead of a soccer ball.
A special hopscotch game
If you have several cardboard boxes, open them so that they can lie flat on the ground. Use a permanent marker to trace the folds and create squares. Number the squares and invite children to hop on them in numerical order, like a hopscotch game.
COGNITIVE ACTIVITIES
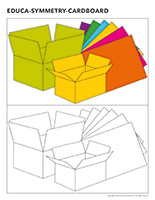
Educa-symmetry-Cardboard
(Open educa-symmetry-Cardboard) Print. Children must color the picture on the bottom (black and white) to make it look exactly like one on the top (color).
Educ-math-Cardboard
(Open educ-math-Cardboard) Print and laminate for durable, eco-friendly use. Children must count the items in each rectangle and circle the corresponding number.
Contrasting textures
Using their sense of touch, children discover how several different textures exist. Some are soft, whereas others are quite rough. Create an exploration bin containing contrasting textures. Here are a few suggestions of items that can be added to your bin: cardboard, Styrofoam, fur, velvet, brush, rug, sandpaper, textured ball, stuffed animal, etc. Recycle items that you have on hand or visit your local dollar store to complete your bin. 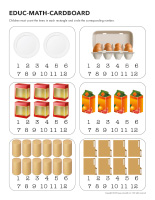
Open your eyes
Wrap three boxes with colorful wrapping paper and set them upside down in a row, leaving a little room between the boxes. Hide a foam ball under one box, in front of your group. Move the boxes around a few times before asking children to guess which box the ball is under. They can simply stand in front of the box that they think the ball is hiding in. Lift the boxes to discover if they were correct. Let children take turns hiding the ball and moving the boxes around.
A show in a box
Remove the bottom and the top of a cardboard box. Decorate the exterior of the box using poster paint or markers to represent a puppet theater. Use fabric scraps to add curtains. Set you theater on a table and encourage children to present a puppet show.
Turning steering wheels
For each child, remove the center portion of a paper plate, keeping only the contour that will represent a steering wheel. Encourage children to color or paint their steering wheel black. Use the steering wheels to help children differentiate right and left. Stand with your back to your group and have fun pretending to turn right and left. Children will readily imitate you. You can even take the steering wheels outside. Children will love driving as you walk through the neighborhood, pretending to avoid various obstacles, stopping at stop signs, etc.
MORAL AND SOCIAL ACTIVITIES
A show in a box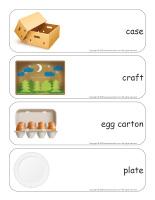
Remove the bottom and the top of a cardboard box. Decorate the exterior of the box using poster paint or markers to represent a puppet theater. Use fabric scraps to add curtains. Set you theater on a table and encourage children to present a puppet show.
Soft space
You will need a few large boxes. Paint them using white poster paint. Set them standing up in your reading corner, with the opening of each box towards the center of the space. Using hot glue, attach pieces of tulle along the top of each box opening to add curtains. Children will enjoy using these little hideouts to read or relax.
Simple mailbox
Find a cardboard box that contains several divisions, for example a wine box. Set it on its side on a shelf. Invite each child to press a label or nametag that represents them on the end of one section. The box will become your group’s mailbox. Children will enjoy sliding their activity sheets, mesages, drawings, etc. in the mailbox throughout the week. Show them how they can simply roll them up and insert them in their section until their parents arrive at the end of the day.
Naptime boxes
Give each child a box and let them decorate it using star, teddy bear, or moon-shaped stickers to create their personal naptime box. Invite children to set their blanket, stuffed animal, pillow, and mattress in their naptime box. Before naptime, children can use their naptime box to carry their belongings to their naptime spot. At the end of naptime, they can simply put everything back in their box. Naptime boxes are a great way to foster autonomy.
Emoticons
Purchase a pack of yellow paper plates. Using a black permanent marker, draw eyes, eyebrows, and a mouth on each plate to represent different emotions (fear, joy, sadness, anger, shyness, etc.). You may also use other colors to add various accessories and details (tears, tongue, hearts, etc.). Use these emoticons to explore and identify emotions with your group.
EARLY SCIENCE/MANIPULATION/EXPLORATION
Sensory bin-Cardboard
Throughout the week, leave a bin filled with cardboard items out for your group to explore. Manipulating the contents of the bin will provide children with the opportunity to discover a wide range of textures and colors.
Tongs, tweezers, and colored cardboard
Gather a variety of tongs and tweezers and set different types of cardboard in front of your group. Encourage children to use the tools to pick up cardboard pieces and set them in a container. This is great fine motor skill practice!
Cardboard dyes
Test different natural dyes on pieces of white cardboard with your group.
- Beets
- Powdered mustard (diluted in water)
- Blueberry, strawberry, or raspberry juice
ARTS & CRAFTS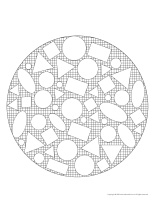
Our group’s cardboard quilt
Using wide adhesive tape (sold in hardware stores), press a square piece of cardboard on the table, in front of each child. Let them paint their square as they see fit. Once the paint is dry, glue the squares together to represent a quilt.
Adhesive paper and cardboard
Hang a large piece of adhesive paper on a wall, with the sticky side towards you. You can use wide colorful adhesive tape (sold in hardware stores) to secure it in place. Let children press scraps of cardboard all over the sticky surface.
Mandalas – Cardboard
(Open mandalas-Cardboard) Print for each child. Invite children to color the mandalas using bold colors.
Three-dimensional mosaic
Provide scraps of several different types of fabric that children can use to create a three-dimensional mosaic. Have them glue the pieces on a large piece of cardboard.
Cardboard homes in different sizes
Use different sizes of milk and cream cartons to create houses for figurines. A small container will be ideal for miniature figurines, but a girafe will require a taller container. A stuffed animal, on the other hand, will need a very large milk carton.
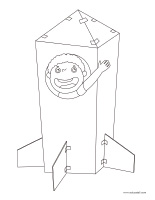
Cardboard costumes
Children will like to use cardboard boxes to create turtle, bee, or ladybug costumes, for example. Simply let them paint the boxes to represent the animal or insect they wish to dress up as. Once the paint is dry, attach 2 pieces of rope to the top of each child’s box. They can hold on to the ropes to “wear” their costumes.
Homemade castanets
Give each child 2 small paper plates that they can color and decorate as they wish. When they are done, help them fold each plate and glue 2 tiny bells inside using hot glue. Show children how they can pinch their plates to create soft musical sounds.
Models-Cardboard
(Open models-Cardboard) Print the various models several times and use them for your activities and projects throughout the theme.
Cardboard mosaic
Simply gather scraps of cardboard that children can use to create a colorful mural.
COLORING PAGES
(Open coloring pages theme-Cardboard) Print for each child.
Different ways to use coloring pages
Identical coloring pages-Cardboard
Print the same coloring page for each child and an additional copy for your model. Color only certain parts of your picture. Present the model to your group and ask them to color their picture to make it look exactly like yours.
Coloring binder-Cardboard
Print and laminate several coloring pages and arrange them in a binder with a few dry-erase markers. Leave everything on a table for children to explore.
Musical drawing-Cardboard
Play musical drawing with your group. Give each child a coloring page. Have children sit around a table. When the music starts, they must pass the coloring pages around the table. Every time the music stops, they must color the picture in front of them until the music starts again.
Homemade puzzles-Cardboard
Give each child a picture to color. When they are done, cut each picture into pieces to create unique puzzles.
Have fun!
The educatall team
 Home
Home Theme activities
 Babies and toddlers
 Arts and crafts
 Science
 Creative recipes
 Tips and tricks
 Extra activities
 Educ-TV
 Newsletter
  Online store
 Educatall club