Insects everywhere
With the month of June comes warm weather...and insects galore! These tiny flying beasts that sometimes sting are part of our outdoor activities, like it or not. They can make our adult life somewhat complicated, but they often entertain and intrigue little ones.
Insects represent the perfect theme for a group project during the month of June. Dedicating a wall in your daycare to bugs will be your way of honoring them. To begin, simply hang a white paper banner (or large piece of green paper) near the bottom of a wall and add pieces of blue paper just above it. Glue green Easter straw, strips of green paper, or even actual grass to the bottom of your white banner. Once this is done, you are ready to add insects.
Ladybugs
There are many different ways to create ladybugs. Here are my two suggestions, but feel free to use the method you prefer. If you wish, you can even let children create ladybugs using their imagination. When they are done, simply glue the ladybugs in your "grass".
Variation 1:
Ladybug
Cut Styrofoam balls in two. Give each child half of a Styrofoam ball and have them paint it red. Once the paint is dry, they can use a marker to draw black spots on it and then complete their ladybug with wiggly eyes and antennae (pipe cleaners).
Variation 2:
Paper plate ladybug
Paint a paper plate with red poster paint. Add black dots and antennae (pipe cleaners).
Bees
As a group, make a beehive that can be added to a corner of your mural. You can then add bees around the beehive or hang them in front of the beehive to make your mural three-dimensional.
Beehive
On a piece of cardboard, trace the outline of your beehive. Glue Honeycomb cereal inside the beehive to make it look as real as possible.
Egg-bees
Encourage children to paint Styrofoam eggs with yellow poster paint. Once the eggs are dry, simply wind a black pipe cleaner around each one to represent stripes. Add two tiny pipe cleaner pieces for the antennae as well as two wiggly eyes.
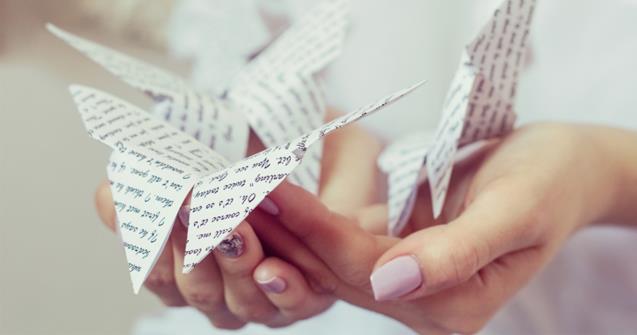
Butterflies
Butterflies are colourful and children love them! With your group, create butterflies and stick them here and there throughout your mural's sky (blue paper). There are also several different ways to create butterflies. Here are three ideas.
Variation 1:
You will need two sheets of construction paper per child. Show children how to fold each sheet of paper accordion-style (like a fan) to make butterfly wings. Cut a butterfly body out of heavy cardboard and glue the butterfly wings on either side of the body. Add eyes and antennae.
Variation 2:
Butterfly in a bag
Fill a sandwich bag with scraps of colourful paper. Tie a pipe cleaner around the centre of the bag to make a simple butterfly.
Variation 3:
The butterfly
Give each child a cone-shaped coffee filter. Show them how to open it up to represent two butterfly wings. Add drops of food coloring to water (a different color to each bowl) and provide eyedroppers. Children can deposit tiny droplets of water on their coffee filter. Encourage them to change colors often. Set aside to dry. The end result will be a pastel-coloured butterfly.
Caterpillars
Let's not forget these little creatures that fascinate children. Use pompoms or egg carton sections to create cute caterpillars and add them to the bottom of your mural, directly on the floor, but close to the wall to add depth.
Pompom caterpillars
Simply stick pompoms together in a row.
Caterpillar
Use six egg carton sections to create a caterpillar. Simply paint and decorate them.
Spiders
I know that these eight-legged creatures aren't really insects, but they are easily spotted by little ones during outings. They sometimes even represent unexpected discoveries. Most of all, they crawl around and spin beautiful webs.
Use white glue to draw lines on waxed paper to represent a spider web. Once the glue is completely dry, gently remove the waxed paper. Hang your spider web in one corner of your mural and add several spiders. If you prefer, you can also use yarn to create your spider web.
Variation 1:
Spider
Attach four pipe cleaners together to form eight spider legs. Glue a piece of elastic thread to the centre of the spider's body and hang it in front of your mural, next to the spider web.
Variation 2:
A spider
Have children paint a Styrofoam ball using black poster paint. Once dry, have them insert black pipe cleaners to represent legs. Finally, glue wiggly eyes or paint spider eyes on the ball.
Of course, there are many other kinds of insects you can add to your mural. For example, if a dragonfly regularly visits your yard, have children use Popsicle sticks and tissue paper to create their own models. If worms are present at the end of a rainy day, stick a few gummy worms on your mural. If ants seem to have taken over your yard, glue two raisins together and draw tiny eyes and antennae using a marker. Use children's experiences and discoveries to add new elements to your mural. Doing so will bring it to life!
Caroline Allard
Early childhood educator
Educatall.com is not responsible for the content of this article. The information mentioned in this article is the responsibility of the author. Educatall.com shall not be held responsible for any litigation or issues resulting from this article.
 Home
Home Theme activities
 Babies and toddlers
 Arts and crafts
 Science
 Creative recipes
 Tips and tricks
 Extra activities
 Educ-TV
 Newsletter
  Online store
 Educatall club