AREA SETUP
(Open thematic poster-Halloween-Creatures) Print, laminate, and decorate the walls of your daycare with all kinds of posters.
To help you prepare for Halloween, the educatall team has prepared a special theme to introduce your group to the various creatures that are related to this celebration. We have chosen five different creatures. You may decide to present one creature per week or slowly present them as Halloween approaches.
For each creature, you will find 2 or 3 different ways of presenting them to your group. The first suggestion is for very young children. Most of the time, you will also find a main activity and a simpler, less time-consuming activity. It is up to you to choose how much time you wish to devote to discovering each of the creatures depending on your schedule and the level of interest children demonstrate.
Educa-theme-Creatures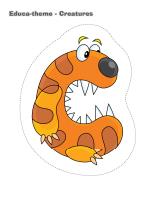
(Open educa-theme-Creatures) Print and laminate the items that represent the theme. These illustrations will help you present the theme to your group (and parents) while decorating a corner of your daycare.
Educa-decorate-Creatures
(Open educa-decorate-Creatures) Print, laminate, and cut out the various items. Use them to decorate your daycare and set the mood for the theme.
Garland-Creatures
(Open garland-Creatures) Print the illustrations. Let children decorate them. Cut them out and hang them within your daycare or near your daycare entrance to create a garland.
Meet Mrs. Pumpkin 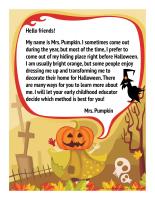
(Open Mrs. Pumpkin) Print and laminate.
Hello friends!
My name is Mrs. Pumpkin. I sometimes come out during the year, but most of the time, I prefer to come out of my hiding place right before Halloween. I am usually bright orange, but some people enjoy dressing me up and transforming me to decorate their home for Halloween. There are many ways for you to learn more about me. I will let your early childhood educator decide which method is best for you! Mrs. Pumpkin
Activities for learning more about Mrs. Pumpkin
For very young children: Purchase pumpkins in several different sizes and let babies manipulate them and roll them around on the floor.
Decorating contest
Purchase small pumpkins and gather accessories and arts & crafts materials children can use to decorate them. When they are done, display the pumpkins and invite parents to vote for their favorite.
Emptying pumpkins
Purchase a few large pumpkins and encourage children to manipulate them and help you empty them using their hands and spoons. If you have the time, you can roast the pumpkin seeds with a small amount of oil and salt. Serve as a snack.
Meet Master Ghost 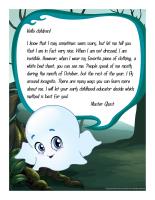
(Open Master Ghost) Print and laminate.
Hello children!
I know that I may sometimes seem scary, but let me tell you that I am in fact very nice. When I am not dressed, I am invisible. However, when I wear my favorite piece of clothing, a white bed sheet, you can see me. People speak of me mostly during the month of October, but the rest of the year, I fly around incognito. There are many ways you can learn more about me. I will let your early childhood educator decide which method is best for you! Master Ghost
Activities for learning more about Master Ghost
For very young children: Apply white paint to the bottom of each child's feet and press them on a piece of black construction paper. Glue wiggly eyes on the heel portion of each print and display the ghosts on a wall. If you wish, you may choose to cut them out and glue Popsicle sticks behind each one to make puppets.
Ghost tag
Select a child who will be "it". He/she must try to catch the other children. When a child is touched, he/she must wear a piece of tulle on his/her head and remain perfectly still. He/she is a ghost. If another child passes through his/her legs, the child who was touched is free to resume running around.
Sticky ghost
Cut a large piece of adhesive paper to give it a ghost-like shape. Encourage children to fill the shape with cotton balls or crumpled pieces of white tissue paper by sticking the materials on the sticky side of the adhesive paper.
Meet Mr. Monstrous 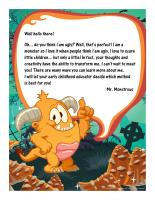
(Open Mr. Monstrous) Print and laminate.
Well hello there!
Oh... do you think I am ugly? Well, that's perfect! I am a monster so I love it when people think I am ugly. I love to scare little children... but only a little! In fact, your thoughts and creativity have the ability to transform me. I can't wait to meet you! There are many ways you can learn more about me. I will let your early childhood educator decide which method is best for you! Mr. Monstrous
Activities for learning more about Mr. Monstrous
For very young children: Fill a large bin with a variety of costumes and accessories (masks, hats, scarves, etc.). Let babies dress up and use the accessories to create unique costumes. Encourage them to look at themselves in a mirror.
The monsters are hiding...
Within your daycare, identify different hiding places for monsters (under a table, behind a couch, behind a door, etc.). Children must listen closely to your instructions and run to hide in the different locations, pretending they are monsters. For example, you may say, "The monsters are hiding under the table." Children must run and hide under a table. Variation: Depending on the ages of the children in your group, you may choose to turn off the lights and provide flashlights.
Collective monster
For this activity, you will need a large box and a variety of recycled containers. As a group, use the items to create one huge monster. If you prefer, divide your group into small teams of 2 or 3 children and encourage them to create several unique monsters. Provide paint and different arts & crafts materials that can be used to complete their creations.
Meet Mrs. Witchie 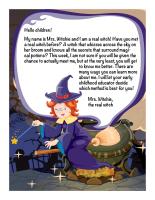
(Open Mrs. Witchie) Print and laminate.
Hello children!
My name is Mrs. Witchie and I am a real witch! Have you met a real witch before? A witch that whizzes across the sky on her broom and knows all the secrets that surround magical potions? This week, I am not sure if you will be given the chance to actually meet me, but at the very least, you will get to know me better. There are many ways you can learn more about me. I will let your early childhood educator decide which method is best for you! Mrs. Witchie, the real witch
Activities for learning more about Mrs. Witchie
For very young children: Purchase several witch hats in department stores or dollar stores. Let little ones try them on and encourage them to dance to the sound of fast-paced music.
Cardboard witch
Have each child paint an empty toilet paper roll using black paint. Once the paint is dry, let them draw a face. They can glue pieces of colourful yarn on the top of the toilet paper roll to represent hair. Use black construction paper to form a witch hat and stick it on top of the hair or make two small incisions that will make it possible for the hat to stay in place.
Witch-scarecrow
Purchase a few black clothing items. Tie the extremities using elastics and stuff them with newspaper scraps or dried leaves. Add a head (a pillowcase for example) and a witch hat to complete your group project. Name your witch or simply call her Mrs. Witchie. Use this character throughout the week. She could even play tricks on your group during naptime if you wish!
Meet Mr. 8 Legs 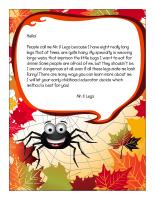
(Open Mr. 8 Legs) Print and laminate.
Hello!
People call me Mr. 8 Legs because I have eight really long legs that, at times, are quite hairy. My specialty is weaving large webs that imprison the little bugs I eat for dinner. Some people are afraid of me, but they shouldn't be. I am not dangerous at all, even if all these legs make me look funny! There are many ways you can learn more about me. I will let your early childhood educator decide which method is best for you!
Mr. 8 Legs
Activities for learning more about Mr. 8 Legs
For very young children: Create your own insect bottles. Recycle clear plastic bottles and containers (mayonnaise, peanut butter, juice, salad dressing, etc.). Fill them with items found in nature and plastic insects. You may choose to add ladybugs to one bottle, spiders to another bottle, and flies to a third bottle. Use hot glue to secure the caps on the bottles. Encourage children to manipulate them.
Spiders have eight legs
Divide your group into teams of two children. One child from each team must get down on his/her hands and knees. His/her partner must lie on top (with his/her stomach touching the first child's back) to add four more legs. Once they are in position, invite children to try to move around the daycare, working as a team. Variation: Organize spider races or have children complete spider obstacle courses with their partner.
The spider web
Give each child a ball of yarn. Attach one end of each ball of yarn to objects located in different areas within your daycare (chairs, furniture items, etc.). Children become spiders and weave a giant spider web simply by moving their ball of yarn in every direction, crossing over the other children's yarn.
Bean spiders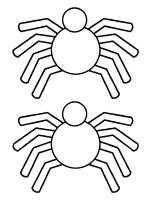
(Open models-Spiders) Print a model for each child. Using glue, have children fill the spider shape with dried black beans. If you wish, add two red dried beans to represent spider eyes. This will make your spider a little scarier!
ROUTINES AND TRANSITIONS
Game-This is my spot-Creatures
(Open game-This is my spot-Creatures) Print two copies of each illustration. Use adhesive paper to stick one copy of each illustration on the table. Place the second copy in a bag. Children take turns picking an illustration to determine where they must sit at the table. You may also use the illustrations to determine children's naptime spots or their place in the task train.
My creature path
(Open my creature path) Print, laminate, and secure the illustrations on the floor of your daycare to create a path leading to the areas frequently visited by children throughout the day. The path can lead to the bathroom, the cloakroom, etc. If you prefer, use the illustrations to delimit various areas.
COGNITIVE ACTIVITIES
Educ-intruder-Creatures
(Open educ-intruder-Creatures) Print and laminate. Children must find the six (6) intruders.
Educ-pairs-Creatures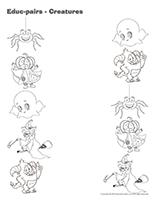
(Open educ-pairs-Creatures) Print. Children must color identical illustrations using the same color or draw a line between them. For durable, eco-friendly use, laminate for use with a dry-erase marker.
Educ-trace-Creatures
(Open educ-trace-Creatures) Print for each child. Children must trace the dotted lines using a crayon of the corresponding color and then color each object using the same color.
Educa-symmetry-Creatures
(Open educa-symmetry-Creatures) Print. Children must color the bottom picture (black and white) to make it look exactly like the top picture (in color).
It's raining creatures!
(Open models-Creatures) Print and cut out enough creatures so that you have at least ten for each child. Deposit all the creatures in the centre of a parachute or blanket. Have children firmly hold on to the edge of the parachute or blanket. When you give them the signal, they must raise the parachute up over their head to send the creatures flying through the air. If you wish, count the creatures collected by each child.
Color by number-Creatures
(Open color by number-Creatures) Print for each child. Child must color the picture according to the color code.
COLORING PAGES
Complete the drawing-Creatures
(Open complete the drawing-Creatures) Print for each child. Have them complete the drawing as they see fit.
I am learning to draw-A monster
(Open I am learning to draw-A monster) Print and laminate the model sheet. Invite children to use the model sheet to practice their drawing technique before attempting to draw a monster on their own.
(Open coloring pages theme-Creatures) Print for each child.
SONGS & RHYMES
(Open songs & rhymes-I'm a silly monster)
I'm a silly monster
Look at me
These are my big eyes
This is my nose
Wiggly antennas
1, 2, 3
I'm a monster who's not scary
Have fun
The educatall team
 Home
Home Theme activities
 Babies and toddlers
 Arts and crafts
 Science
 Creative recipes
 Tips and tricks
 Special needs
 Extra activities
 Educ-TV
 Newsletter
  Online store
 Educatall club


