AREA SETUP
Print a variety of posters and use them to decorate the walls of your daycare. (Open thematic poster-Handmade gifts)
Educa-decorate-Handmade gifts
(Open educa-decorate-Handmade gifts) Print, laminate, and cut out the illustrations. Use them to decorate your walls and set the mood for the theme.
Christmas chains
(Open Christmas garland) Print the models. Set each one on paper that you have folded accordion-style and cut out the shapes. Leave the edges connected so that when you unfold the paper, the shapes will form a chain. Let children decorate the garland elements. Hang your garlands near your daycare entrance or within your daycare.
Educa-theme-Handmade gifts
(Open educa-theme-Handmade gifts) Print and laminate the different elements representing the theme. Use them to present the theme to your group (and their parents) while decorating your daycare.
Advent activity calendar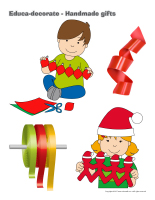
(Open Advent activity calendar) Print and use the calendar to prepare for Christmas with your group. Simply display the 25 numbered illustrations in order and add the daily activity (craft, motor skills game, outdoor activity, song, recipe, etc.) below each date.
Inventory-Handmade gifts
(Open inventory list-Handmade gifts) Print and add this sheet to your thematic bins. Use it to inventory your Christmas-related items.
Gift-giving list
(Open gift-giving list) Print and use this sheet to prepare a list of the gifts you wish to purchase for the children in your group (and their parents).
Storage labels-Christmas arts & crafts materials
(Open storage labels-Christmas arts & crafts materials) Print and stick the labels on your storage bins. Fill your bins with your materials and add an inventory sheet to each one.
Binder covers-A year of crafts
(Open binder covers-A year of crafts) Print and stick each binder cover on a different binder that shall be used for crafts relating to a specific theme during the year.
Christmas wall-Handmade crafts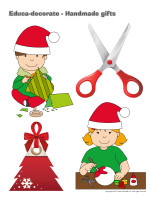
Create a special Christmas-themed wall that represents the children in your group. Write the adorable things they say, add their drawings, display their crafts, etc. Hang a big gold star from the ceiling, in front of your wall. Make sure your Christmas wall is somewhere everyone is sure to see it. If you wish, you could also set up a special clothesline in front of or next to your wall and use it to hang a gold star for each child.
Christmas tree
Make a variety of Christmas decorations with your group. Give each child a tree branch and a metal can. Children fill their can with sand and insert their branch. If you prefer, use a single larger branch and a bucket for a group project. If you wish, the branches can be painted white. Add glitter to the paint. Children will love hanging the decorations they make in their little Christmas tree.
Fun Christmas ceiling
Create a simple mobile by hanging various Christmas shapes and items from the ceiling using Christmas-colored ribbon. If you prefer, simply stick Christmas illustrations or scenes on the ceiling, over your changing table for example. You will find everything you need in the educatall club.
Christmas mobile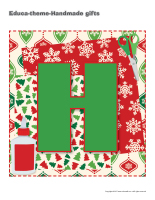
(Open craft-Christmas shapes) Print the shapes on colourful paper and cut them out. Stick glitter and sequins on both sides of each shape. On the tip of each shape, glue strips of tissue paper. Punch a hole out of each shape and thread a piece of ribbon through. Criss-cross two wooden skewers and knot them together with wire. Hang the shapes from the ends of the skewers.
SPECIAL TOOL
This tool was created in response to a special request received. (Open adhesive labels-Christmas) Print and use the labels for different games.
CIRCLE TIME
Flipogram-Handmade gifts
(Open picture game-Handmade gifts) Print and laminate the pictures in the format you prefer. Use a hole-punch to make a hole in the upper right and left corner of each picture. Stack the pictures and insert a ring through each set of holes. The flipogram is easy to manipulate. Simply show children how they can lift a picture and flip it under the stack. Name each item with your group. Use the flipogram to encourage children to talk during circle time and to ask them questions about the theme.
THEMATIC ARTS & CRAFTS BOX-CHRISTMAS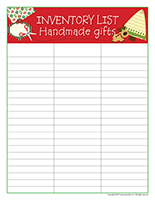
Fill a bin with red, green, and white waxed crayons, wooden coloring pencils, and markers. If you wish, you could set them in a special container. Add red food coloring to a few bottles of white glue. Fill pill bottles with metallic confetti, Christmas stickers, and red, green, and white feathers. Add all kinds of papers (tissue paper, crepe paper, cellophane paper, metallic paper, etc.). Finally, provide pompoms, ribbon, pipe cleaners, etc.
PICTURE GAME-HANDMADE GIFTS
The pictures may be used as a memory game or to spark a conversation with the group. Use them to decorate the daycare or a specific thematic corner. (Open picture game-Handmade gifts) Print, laminate, and store in a “Ziploc” bag or in your thematic bins.
Memory game-Handmade gifts
(Open picture game-Handmade gifts) Print the pictures twice and use them for a memory game.
LANGUAGE ACTIVITIES
The flashcards may be used during circle time to spark a conversation with the group or in your reading and writing area. They may also be used to identify your thematic bins. (Open word flashcards-Handmade gifts) (Open giant word flashcards-Handmade gifts) Print. scissors, glue, confetti, glitter, crayons, ribbon, box, gifts, greeting card, envelope, gift tag, wrapping paper
Let’s chat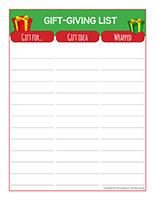
(Open word flashcards-Handmade gifts) (Open giant word flashcards-Handmade gifts) Print and laminate the word flashcards. Have each child pick a word and present it to the group (ex. ribbon). Ask them questions to see what they know about the theme.
Word clothesline
(Open word flashcards-Handmade gifts) (Open giant word flashcards-Handmade gifts) Print two copies of several word flashcards. Hang one copy of each word on an indoor clothesline with colourful clothespins. Arrange the copies in a pile on a table. Let children take turns picking a word and finding the matching word on the clothesline. When they find a match, they can place the flashcard on top of the one that was already hanging on the clothesline. Help younger children manipulate the clothespins if necessary.
Word race
(Open word flashcards-Handmade gifts) (Open giant word flashcards-Handmade gifts) Print several word flashcards and hide them throughout your daycare or yard. Divide your group into two teams. When you give them the signal, children must search for the flashcards for a pre-determined period, for example three minutes. When the time is up, children must be able to “read” their flashcards to earn a point for their team. If they are unable to find the correct word, the other team can earn the point if they succeed.
Tracing words-Handmade gifts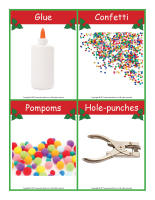
(Open word flashcards-Handmade gifts) (Open giant word flashcards-Handmade gifts) Print several word flashcards. Glue them on pieces of paper, laminate them, and arrange them in a binder. Show children how they can trace the words using dry-erase markers. If you wish, leave room under each word so children can try to write the words without tracing the letters.
Word association-Handmade gifts
(Open word flashcards-Handmade gifts) (Open giant word flashcards-Handmade gifts) Print two copies of several different word flashcards. On a large piece of cardboard, stick one copy of each flashcard vertically to create a word column. Cut the second copy of each word flashcard so you have the word on one side and the illustration on the other side. Attach Velcro behind each part as well as to the right of the uncut flashcards (on the cardboard). Arrange the cut flashcards on the table and encourage children to look at your flashcard board to identify a matching word and illustration. When they succeed, they may stick them next to the corresponding flashcard, on your board. This exercise will help children associate words with pictures.
HANDMADE GIFTS IN A JAR
Stickers for handmade gifts in a jar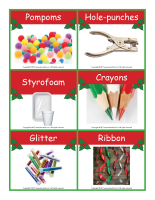
(Open stickers-Handmade gifts in a jar) Print on adhesive paper and have children stick them on their unique gifts.
Homemade snow globe
To make a snow globe, you will need artificial snow, glitter, a jar with a lid (Mason jar or a clean jam jar), animal figurines, and a variety of tiny decorative items. You will also need water and a few drops of baby oil. Glue the figurines on the inside of the lid using hot glue. This will become the bottom of your snow globe. Next, add a small quantity of artificial snow and glitter to the jar. Fill the jar with water and add a few drops of baby oil. Place the lid on the jar and use hot glue to seal it in place. Decorate the lid as you wish. Turn the snow globe over and watch the snow flutter around.
Decorative jar
To make a decorative Christmas jar, you will need sugar, glitter, a jar with a lid (Mason jar or a clean jam jar), animal figurines, and other tiny decorative items. Use white modeling dough to stick the figurines inside the lid. This will become the bottom of your decorative jar. Add sugar and sequins to the jar. Seal the lid with hot glue and overturn the jar. If you wish, decorate the lid.
Jar of chocolates
Give each child a baby food jar. Have them apply white glue to the outside of the jar and press sequins all over. Glue a picture of each child on his jar. Fill the jars with tiny chocolates. Add a pretty red, green, or white ribbon.
Santa’s cookies in a jar
(Open labels-Santa’s cookies in a jar) Print the labels and follow instructions to prepare Santa’s cookies in a jar. Make sure the ingredients are added to the jar one at a time to create pretty layers.
Soup in a jar
This is a great gift for mothers, godmothers, and grandmothers. Give each child a Mason jar with a 500-ml (2-cup) capacity. Have children measure the ingredients per the order in which they are listed. Help children seal their jar and let them decorate the lid with a pretty piece of Christmas fabric or felt. (Open labels-Handmade gifts-Soup)
- ¼ cup of red lentils
- ¼ cup of split peas
- ¼ cup of barley
- 1/3 cup of powdered beef stock
- 2 tbsp of parsley
- 3 tbsp of onion flakes
- 1/3 tsp of pepper
- 1 tsp of basil
- ¼ to ½ cup of alphabet pasta
Chocolate reindeer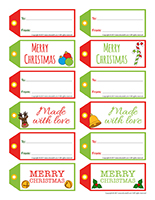
Have each child fill a small jar with chocolate balls. Once their jar is full, have them decorate it so it looks like a reindeer. Twist pipe cleaners together to represent antlers and use hot glue to stick them on the lid. Add red ribbon, a red pompom for the nose, and wiggly eyes.
HANDMADE GIFTS-ORIGINAL IDEAS
Stickers-Handmade gifts
(Open stickers-Handmade gifts) Print on adhesive paper and have children stick them on their unique gifts.
My little Christmas tree
If you have a cedar hedge or pine trees in your yard, collect a few branches, one for each child. Give each child a ball of white modeling dough. Encourage them to prick their branch in the dough to represent a pine tree in the snow. Make sure the balls of modeling dough are big enough to hold the tree branches upright. Let children decorate their little Christmas tree by gluing pompoms on their branch to represent ornaments. They may also add Christmas ribbon to represent garlands. A star or angel-shaped sticker can complete their tree.
Christmas in the car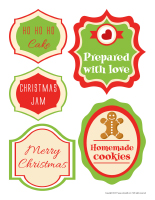
The smell of pine trees is associated with Christmas. Purchase tiny tulle bags at your local dollar store and give one to each child. Outside, cut tiny cedar or pine tree branches with your group. Encourage children to collect small pinecones (or buy some). When you go back inside, let children fill their tiny bag with the items. Add a few drops of pine essential oil to each bag. If you wish, you may also provide Christmas confetti and add it to the bags for a touch of color. Knot the top of each child’s bag with red ribbon and explain how their parents can hang their tiny bag from the rear-view mirror in the car. They will enjoy the Christmas scent on their way to and from daycare.
Christmas wishes
Purchase a wooden frame for each child at the dollar store. You will also need “chalkboard paper”. Trace the centre of each frame on the chalkboard paper and have children cut out the shape. Help children write “Merry Christmas” in the centre of the paper with chalk. They can also draw snowflakes, candy canes, gifts, Christmas trees, etc. You can have children paint their frame or leave them as they are for a more rustic look. Of course, the frames can also be decorated with Christmas elements (confetti, glitter, stickers, foam shapes, etc.).
Christmas cushions
Purchase a single-coloured cushion for each child at the dollar store. Use fabric markers to write “Ho! Ho! Ho!” or “Merry Christmas” on each cushion. Pour a small amount of white or red poster paint in aluminum pie plates and encourage children to press their fingers in the paint and then on their cushion to represent snowflakes, Rudolph’s nose, or Christmas lights. Let dry. Children will like relaxing on the couch with their Christmas cushion.
Miniature Christmas stockings
Purchase several pairs of red baby socks and miniature candy canes or other Christmas treats at the dollar store. Give each child one sock and several Fun Foam Christmas shapes. Let children glue the shapes on their sock to decorate it. If you wish, they may add a few drops of glitter glue here and there. Glue both ends of a pretty velvet ribbon behind each child’s sock and let them fill their sock with treats. They will love hanging their miniature Christmas stocking in the Christmas tree.
Christmas kitchen utensils
Purchase a spatula or spoon with a red silicone tip and a wooden handle for each child. Let children decorate the handle as they wish using red, green, or white poster paint. They can, for example, paint the words “Merry Christmas” on it or simply add colourful dots. Let dry. Apply a coat of non-toxic varnish to protect their work. Children will be happy to give their kitchen utensil to their favorite cook as a gift.
Cinnamon-scented candle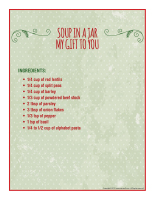
Have each child decorate a large candle by gluing cinnamon sticks all around it. When they are done, they can tie a pretty ribbon around it too. Use hot glue to stick holly or a pine branch along with a gift tag on the ribbon. (Open gift tags-Christmas-Handmade gifts)
Picture wreath
Have children cut a circle out of a piece of cardboard. Next, have them cut a small circle out of the centre of the first one and discard it. Provide clothespins they can glue all the way around their wreath (pinching part pointing out). Let dry. Have children decorate their wreath as they wish. Children use the clothespins to display pictures.
Tea wreath
Have children cut a circle out of a piece of cardboard. Next, have them cut a small circle out of the centre of the first one and discard it. Provide clothespins they can glue all the way around their wreath (pinching part pointing out). Let dry. Have children decorate their wreath as they wish. Children use the clothespins to add colourful tea bags.
Christmas bookmarks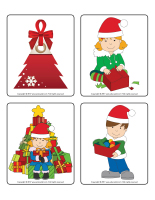
Knot pretty Christmas ribbon on colourful paperclips to create bookmarks. Wrap the bookmarks in clear wrapping paper.
Photo booth bookmarks
(Open photo booth-Christmas) Print the various models. Cut them out and glue a red or green drinking straw behind each one. Purchase hats, scarves, glasses, etc. at your local dollar store. Create a Christmas-themed décor using a large piece of cardboard or curtain. Invite children to pick the accessories they prefer and pose for you. You can take individual, group, or family photos. Print four pictures for each child (wallet size) and glue them on a rectangular piece of cardboard. Laminate. Use a hole-punch to make a hole at the top of the bookmark and thread a pretty ribbon through it to complete the bookmark.
Christmas coasters
Cut circles out of Fun Foam or cork sheets. Have children decorate them as they wish.
Homemade Advent wreath
Cut a large circle out of a piece of cardboard. Cut a second circle out of the centre of the first one and discard it. You will need 25 empty toilet paper rolls. Insert a tiny surprise (chocolate, candy, etc.) in each one. Wrap each toilet paper roll, knotting both ends like a candy piece. Number the rolls from 1 to 25. Glue them all the way around the wreath.
My gift puzzle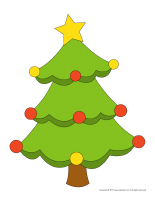
Print an 8 x 11 picture of each child. Laminate the pictures and glue the pieces of a puzzle behind each one. Have children cut out the puzzle pieces and place them in a small Christmas box. They will be proud to give their puzzle to their parents as a Christmas present.
Personalized pillowcase
Give each child a pillowcase. If you wish, let children draw on their pillowcase with fabric markers. Their personalized pillowcase will make the perfect gift for a family member.
Reusable shopping bags
You will need very large rectangular pieces of fabric. Fold each one in half, lining up the corners. You can glue or sew them to create shopping bags. Add two fabric handles to each bag. Let children decorate their bag with fabric markers. You may also choose to maker smaller shoe bags. Reusable bags are very useful gifts!
Christmas tree ornaments
Cut wooden Popsicle sticks into three pieces. Give each child three Popsicle sticks plus 1/3 of a Popsicle stick. Have children paint the complete Popsicle sticks with green poster paint. Let dry. Stick the three complete Popsicle sticks together to form a triangle. Glue the smaller piece below the triangle to represent a trunk. Children decorate their wooden Christmas tree with ribbon, pompoms, glitter, and of course, a star sticker at the top. Stick a piece of clear thread behind each ornament. They make great gifts for parents!
Pinecone reindeer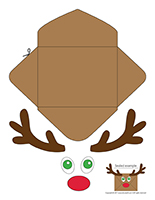
Give each child a pinecone. Let them decorate it by gluing a red pompom for the nose and brown pipe cleaners for antlers. Add wiggly eyes. These reindeer look adorable in Christmas trees.
Reindeer ornaments
Have children paint three Popsicle sticks with brown paint. Let dry. Have children glue them together to form a triangle. Give each child a red pompom they can glue in a corner to represent a nose. Wiggly eyes can be glued above the nose. Twist two brown pipe cleaners together and glue them at the top of the triangle to represent antlers. Stick a piece of invisible thread behind each child’s reindeer so they can be hung in their Christmas tree.
Reindeer flower pots
Give each child a clay or plastic flower pot. Set the flower pots upside down on the table. Invite children to draw a reindeer face on the front of their flower pot. Once this is done, they can glue a red pompom in the centre of the face to represent a nose. For the antlers, insert brown pipe cleaners in the holes that are normally on the bottom of flower pots and have children twist them into place.
Construction paper reindeer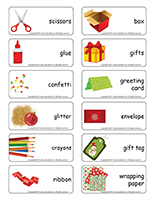
Give each child a square piece of brown construction paper and show them how they can fold it in half to form a triangle. Cut antlers out of green construction paper and add a red pompom on the tip of the triangle to represent a nose. Add wiggly eyes or two eyes cut out of construction paper. This makes a great greeting card or decoration.
Tiny scented sachets
Give each child a piece from an old lace curtain. Have them deposit potpourri in the centre of their fabric. Once this is done, lift all four corners and use red or green ribbon to create a sachet.
Christmas wishes box
Decorate an empty tissue box and set it next to your daycare entrance. Encourage parents to write special Christmas wishes for your group and insert them in your box.
Christmas memo holders
For each child, glue a magnet on a clothespin. Have children create a salt dough shape they can glue on the clothespin to decorate their memo holder.
Magical lanterns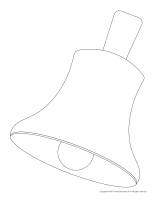
You will need a small empty glass jam jar for each child. Ask children to cut (or tear) tiny pieces of red, green, and white tissue paper. They can glue the pieces of tissue paper on their jar, overlapping them ever so slightly. We recommend using white glue or Mod Podge. Let dry completely. Set a tealight candle in each jar.
Christmas ornaments
Give each child an empty glass jar (ex. jam). Have them create a shape using modeling dough or, if you prefer, have them choose a Christmas figurine that can fit inside their jar. Use hot glue to stick the shape or figurine inside the lid. Pour water into the jars until they are half-full. Add sequins and glitter. Put the lids on the jars and use hot glue to seal them. Turn the jars over so the lids are on the bottom. Shake the jars and watch the show!
Christmas place cards
Give each child a wooden clothespin. Have them paint it red. Let dry. (Open Christmas place cards) Print and trace the models on construction paper and cut them out. Assemble the characters per the models. Write the name of a child or the name of one of his family members on the place card. Let them add pompoms, wiggly eyes, etc. These clothespin place cards can easily be added to napkins.
My Christmas drinking straw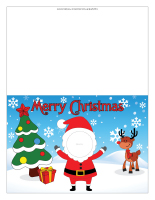
(Open Christmas designs) Print and ask children to color the designs. Use a hole-punch to make holes where indicated. They will enjoy sliding a drinking straw through a design and using it to drink at snack time.
Christmas letter holder
Give each child two Christmas paper plates. Cut one paper plate in half and discard one half. Apply white glue around the contour of the cut plate, position it so the insides of both plates are facing each other, and press the plates together. Let dry. Use a hole-punch to make holes around the portion of the larger plate that you did not apply glue to. Have children thread a ribbon through the holes, starting at the top. Use a long piece of ribbon to hang the letter holders. Add glitter for a special touch.
Pencil holder
Give each child a small metal can (make sure the edges are not sharp). Help them remove the label. Have them wrap their can with pretty paper or, if they prefer, they can paint it. Provide Fun Foam Christmas shapes they can use to decorate their can. Parents will love receiving this useful present!
Snowmen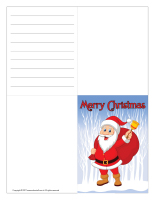
Have each child use white poster paint to paint a wooden spoon. Show them how they can use modeling dough to create a snowman nose and set them aside to dry. Next, have them cut a snowman hat shape out of black felt. When the nose is dry, they can glue it in the centre of their spoon, with the hat at the tip. They can use markers to add other details. Pink chalk can be used to give their snowman rosy cheeks. To complete their snowman, they can stick black buttons on the spoon handle.
Facecloths
You will need light facecloths and acrylic paint for this craft. Have children paint their hands and press them on a facecloth to make handprints. Use a permanent marker to write the year and the child’s name on each facecloth. Roll them up and tie a pretty ribbon around each facecloth to complete this gift.
Refrigerator magnets
Take a picture of each child wearing a Christmas hat in front of a Christmas-themed background. Next, cut a frame out of heavy cardboard. Have each child paint and decorate his frame. Add each child’s picture to his frame and glue magnets behind it.
Mommy’s angel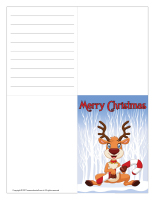
Use construction paper to form a cone for each child. Give each child a picture of himself. Draw a circle around each child’s face (in his picture) and have them cut out the circle. Help children glue their picture on the tip of their cone. Next, children trace their hands on construction paper and cut them out. They glue one hand on either side of the cone to represent wings.
Picture frame
(Open Christmas frame) Print and glue the frame on heavy cardboard. Remove the centre and add a picture.
Christmas baskets
Have each child decorate a Styrofoam drinking glass by gluing Christmas shapes on it. Make a tiny hole on either side of each glass and thread a green or red pipe cleaner through the holes to create a handle. Provide tiny chocolates or candy pieces children can use to fill their Christmas basket.
Scented bags
(Open models-Christmas) Use the models to trace the same shape on felt two times per child. Use a hole-punch to make holes all the way around each shape. Have children set identical shapes one on top of the other and thread red or green yarn through the holes to “seal” the shapes. Before completely closing them off, have them stuff the shapes with potpourri. Tie a knot and wrap up this special scented gift for parents.
Sweet necklaces for mothers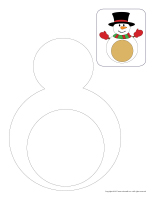
Give each child a tiny Christmas tree shape cut out of heavy green cardboard or Fun Foam. Use a hole-punch to make a hole at the top of each tiny tree. Have them apply white paint all over their tree before sprinkling it with sugar. Let dry. Children can thread their Christmas tree on a ribbon to create a necklace.
Christmas brooches
You will need the tops of several frozen juice cans. Apply white glue to each metal circle and have children decorate them with red, white, and green glitter, sequins, beads, etc. Let dry. Once the glue is completely dry, use hot glue to stick a pin behind each metal circle to complete your Christmas brooches.
Bracelets
Cut an empty toilet paper roll into rings. Make a small incision in each ring. Have children decorate them. You will have adorable bracelets children can wear.
Christmas jewellery
(Open models-Christmas jewellery) Cut 2-cm strips out of colourful paper. Adjust the strips so they fit around children’s wrists. Use glue to overlap Christmas gems and decorations on the strips of paper, alternating colors.
Christmas necklaces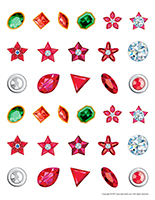
Use red, green, and white pasta pieces to make necklaces. Here is a simple recipe for dying pasta:
- 1 pint of dry pasta
- 2 tbsp of food coloring
- 3 tbsp of rubbing alcohol (must be prepared by an adult, not for consumption)
HANDMADE GIFTS-FOR YOUR CHRISTMAS TABLE
Coasters
(Open models-Christmas coasters) Print the models. Have children assemble them. Use cork or felt to decorate the coasters.
Rustic table runner
Give each child a long piece of burlap (approx. 30 cm width). Use large plastic tablecloths to protect your floor throughout this project. Let children spread their table runner out on the tablecloths. Provide Christmas cookie cutters they can press in paint and then on their table runner. Let dry. Help children roll up their table runner and wrap it with pretty ribbon. The final touch: help them make a pretty bow.
Christmas tablecloth
Purchase a paper tablecloth. With your group, cut Christmas-related items out of magazines or flyers. Have children glue the items on the tablecloth. Use your decorated tablecloth for your Christmas lunch.
Christmas place cards
Give each child a wooden clothespin. Have them paint it red. Let dry. (Open Christmas place cards) Print and trace the models on construction paper and cut them out. Assemble the characters per the models. Write the name of a child or the name of one of his family members on the place card. Let them add pompoms, wiggly eyes, etc. These clothespin place cards can easily be added to napkins.
My Christmas drinking straw
(Open Christmas designs) Print and ask children to color the designs. Use a hole-punch to make holes where indicated. They will enjoy sliding a drinking straw through a design and using it to drink at snack time.
Napkin rings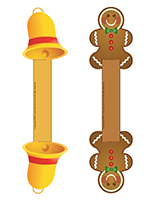
(Open Christmas napkin rings) Print on heavy cardboard and cut out. Have children decorate the items with stickers or glitter. Cut where indicated and insert one end in the other. Slide a napkin through each ring.
Napkin rings
(Open Christmas napkin rings-color) Print on heavy cardboard and cut out. Have children decorate the items with stickers or glitter. Cut where indicated and insert one end in the other. Slide a napkin through each ring.
Christmas napkins
You will need light facecloths and acrylic paint for this craft. Have children paint their hands and press them on a facecloth to make handprints. Use a permanent marker to write the year and the child’s name on each facecloth. Roll them up and tie a pretty ribbon around each facecloth to complete this gift.
HANDMADE GIFTS-PACKAGING
Stickers-Handmade gifts-Packaging
Print on adhesive paper and use the stickers on your original handmade gifts.
My reindeer bag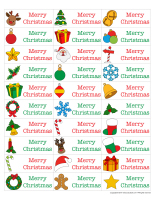
Give each child a brown paper lunch bag he can use to wrap a gift. (Open model-gift bag-Reindeer) Print on white paper. Have children color and cut out the parts. Once the gift is in the bag, fold the top of the bag and use the shapes to represent a reindeer face. If you prefer, print the parts on adhesive paper. Children can simply cut them out and stick them on their bag.
Decorative boxes
(Open craft-decorative box) Print and trace the model on construction paper (one per child). Cut it out and use the model to create a box. Let children decorate their box as they wish. They can fill it with Christmas cookies and seal it with red or green ribbon.
Poinsettias
Have children paint several coffee filters with red paint. Once the paint is dry, have them cut tiny slits in the coffee filters. Wrap a green pipe cleaner around the bottom of each coffee filter to create poinsettias that can easily be used to decorate a tree or gifts.
Candy wrapping
Give each child a piece of paper big enough to wrap an empty toilet paper roll. Have them fill an empty toilet paper roll with candy pieces before rolling it up in the paper. Use ribbon to tie both ends.
Christmas house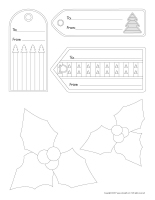
Have each child insert a small gift in a brown paper lunch bag before decorating it to make it look like a house. (Open model Christmas house) Children color and cut out the parts. They fold the top of the bag over and glue the door, windows, and chimney on their bag. They can fold a piece of construction paper in half and use it to represent the house’s roof. If you have decorative-edged scissors, use them to cut along the bottom of the roof.
Gift bags
Cut the top off a 2-litre milk carton for each child. Children can paint their carton or wrap it in colourful construction paper. Apply glue and decorate the carton with glitter. Staple the ends of a ribbon on either side to form a handle. Children can set a small gift inside the carton and add tissue paper on top of it.
Gift box
Give each child an old shoebox. Let them paint or decorate their box as they wish. This is the perfect container for a special Christmas present for parents.
HANDMADE GIFTS-GREETING CARDS
Reindeer envelopes
(Open reindeer envelopes) Print an envelope for each child. Fold the envelopes along the lines and glue the sides. Add wiggly eyes and a red pompom (nose).
Soft pine tree card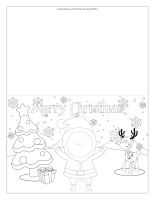
For each child, fold a piece of construction paper in half to create a basic card. Draw a large triangle on the top of each card. Provide green feathers and show children how they can glue them inside the triangle, overlapping them to represent a pine tree. If they wish, they may add tiny Christmas stickers to represent ornaments.
Personalized Christmas greeting cards
You will find two greeting card models. (Open Christmas greeting card-Personalized) (Open Christmas greeting card-Personalized-color) If you choose to use the black and white version, have children color the items and glue them on the card. Otherwise, simply print the items and have children add them to their card.
Envelopes for greeting cards
(Open Christmas envelop) Print an envelope for each child and fold along the lines. Glue the sides and let children color or decorate their envelope as they wish.
Christmas gift tags
(Open Christmas labels) Print the labels on adhesive paper and stick them on gifts to identify them.
Christmas cards
You will find two greeting card models in the educatall club. (Open Christmas greeting card-black and white) (Open Christmas greeting card-Color) If you choose to use the black and white version, have children color the card. Otherwise, simply print the cards.
Card-Christmas explosion
Use the paper or cardboard you prefer to create a card for each child. Add a few drops of red, green, and white paint on each child’s card and have them spread the color around by blowing through a drinking straw.
COLORING PAGES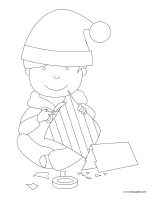
(Open coloring pages theme-Handmade gifts) Print for each child.
DIFFERENT WAYS TO USE THE COLORING PAGES
Identical coloring pages-Handmade gifts
Print the same coloring page for each child and an additional copy for your model. Color only certain parts of your picture. Present the model to your group and ask them to color their picture to make it look exactly like yours.
Coloring binder-Handmade gifts
Print and laminate several coloring pages and arrange them in a binder with a few dry-erase markers. Leave everything on a table for children to explore.
Musical drawing-Handmade gifts
Play musical drawing with your group. Give each child a coloring page. Have children sit around a table. When the music starts, they must pass the coloring pages around the table. Every time the music stops, they must color the picture in front of them until the music starts again.
Homemade puzzles-Handmade gifts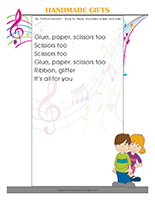
Give each child a picture to color. When they are done, cut each picture into pieces to create unique puzzles.
SONGS & RHYMES
(Open songs & rhymes-Handmade gifts)
Sung to: Head, shoulders, knees, and toes-By: Patricia Morrison
Handmade gifts
Glue, paper, scissors too
Scissors too
Scissors too
Glue, paper, scissors too
Ribbon, glitter
It’s all for you
Have fun!
The educatall team
 Home
Home Theme activities
 Babies and toddlers
 Arts and crafts
 Science
 Creative recipes
 Tips and tricks
 Extra activities
 Educ-TV
 Newsletter
  Online store
 Educatall club